
How do seal end box dielines, zipper tear strips, and glue-assist flaps work?
Short answer: An ECMA A10.10.01.01 seal end dieline uses four overlapping end flaps at the top and bottom: two minor dust flaps fold in first, the inner major flap with bare unvarnished glue-assist strips folds down second, and the outer major flap bonds over it with a perforated zipper tear strip.
On this page
- How does an ECMA A10.10.01.01 full-overlap seal end box dieline work
- How are zipper tear strips, re-closable pantry tabs, and side pour spouts engineered on a seal end dieline
- Why must UV varnish and film lamination be masked off the inner major glue flaps and side seam
- How do I set up bleed, Nutrition Facts, UPC barcodes, and lot-code stamp windows on a seal end print file
- How do I get a custom seal end dieline and 3D proof from CubitPack
- Common mistakes
- FAQs
Request a custom quoteFree dieline & 3D mockup
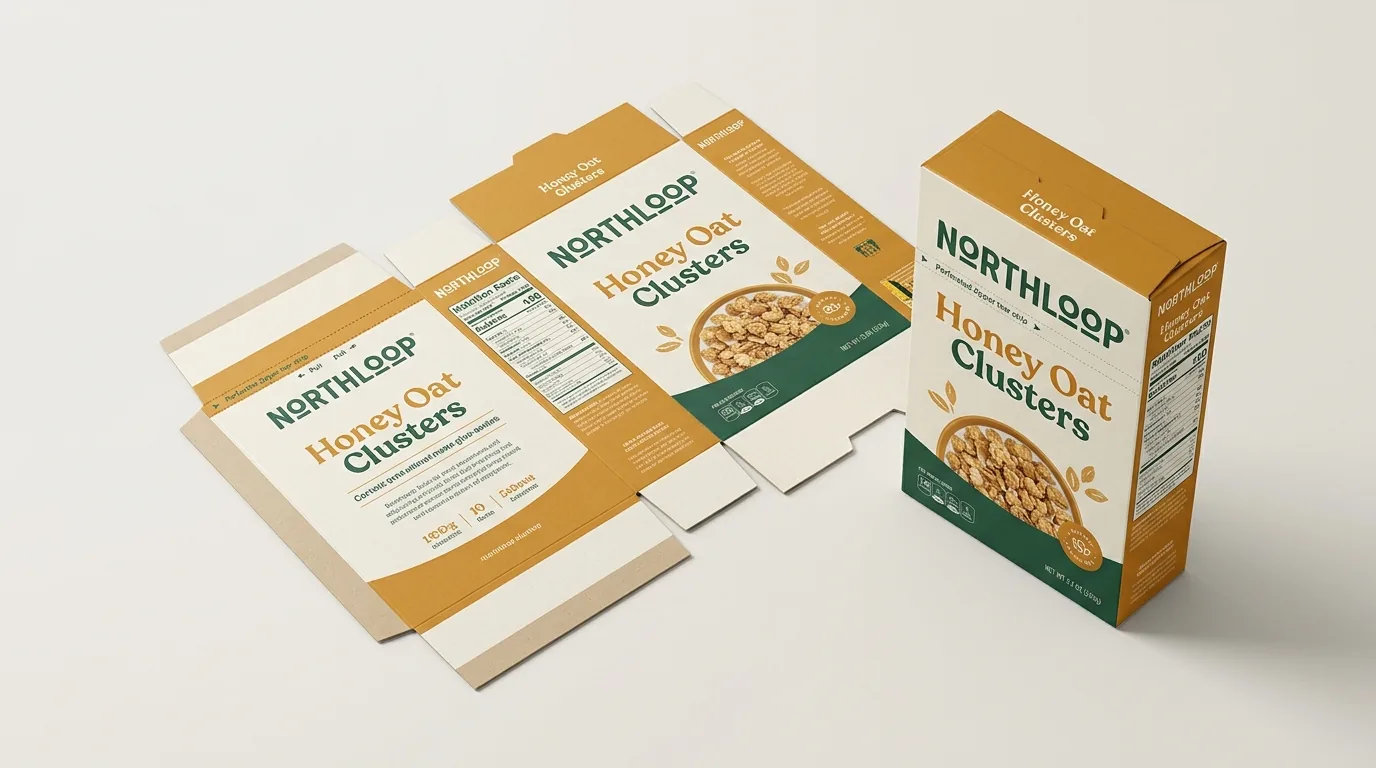
Understanding the engineering of an ECMA A10.10.01.01 dieline for custom seal end boxes ensures your cartons seal with a 100% fiber-tear bond on the packing line and open cleanly in your customer's kitchen. Across the flat print sheet from left to right, the four vertical body panels run Back (Length, L) → Left Side (Width, W) → Front (Length, L) → Right Side (Width, W), joined by a 0.50 to 0.75 inch side glue flap. At both the top and bottom of the carton, two minor dust flaps extend from the narrow Left and Right Side walls, while two deep major glue flaps extend from the wide Back and Front walls at 75% to 95% of Inside Width (W). Leaving bare, unvarnished glue-assist knockouts on the inner major flaps lets hot-melt or cold PVA glue grip the paperboard fibers directly, while a double-rule zipper tear strip and tab-in-slot reclosure on the top outer flap let shoppers open and re-close the box cleanly.
How does an ECMA A10.10.01.01 full-overlap seal end box dieline work?
When you order custom seal end boxes from CubitPack, our structural team builds a custom 2D vector dieline calibrated to your exact Inside Length × Width × Height, board caliper (18 pt to 24 pt or E-flute), and sealing method. Here is what each part of the flat dieline does on the erecting and gluing line
| Dieline zone | Location on flat sheet | Engineering rule & dimension | Role during sealing & opening |
|---|---|---|---|
| Four main body walls | Back (L) · Left (W) · Front (L) · Right (W) | Pre-broken 90° vertical scores for instant squaring | Forms the rigid rectangular carton body |
| Four minor dust flaps | Top & bottom of Left and Right Side walls | Depth = 45–50% of Inside L (tapered 15° shoulders) | Fold inward first at 90° to support the major flaps |
| Inner major glue flaps | Top & bottom of Back panel (Column 1) | Depth = 75–95% of Inside W · Includes glue knockouts | Folds down second; carries the bare glue-assist strips |
| Outer major cover flaps | Top & bottom of Front panel (Column 3) | Depth = 85–100% of Inside W · Printed exterior face | Folds down last over the glue so front seam stays clean |
| Longitudinal side glue flap | Left edge of Back panel | 0.50–0.75 in (13–19 mm) wide, unprinted & unvarnished | Pre-glued on the folder-gluer so cartons ship 100% flat |
How are zipper tear strips, re-closable pantry tabs, and side pour spouts engineered on a seal end dieline?
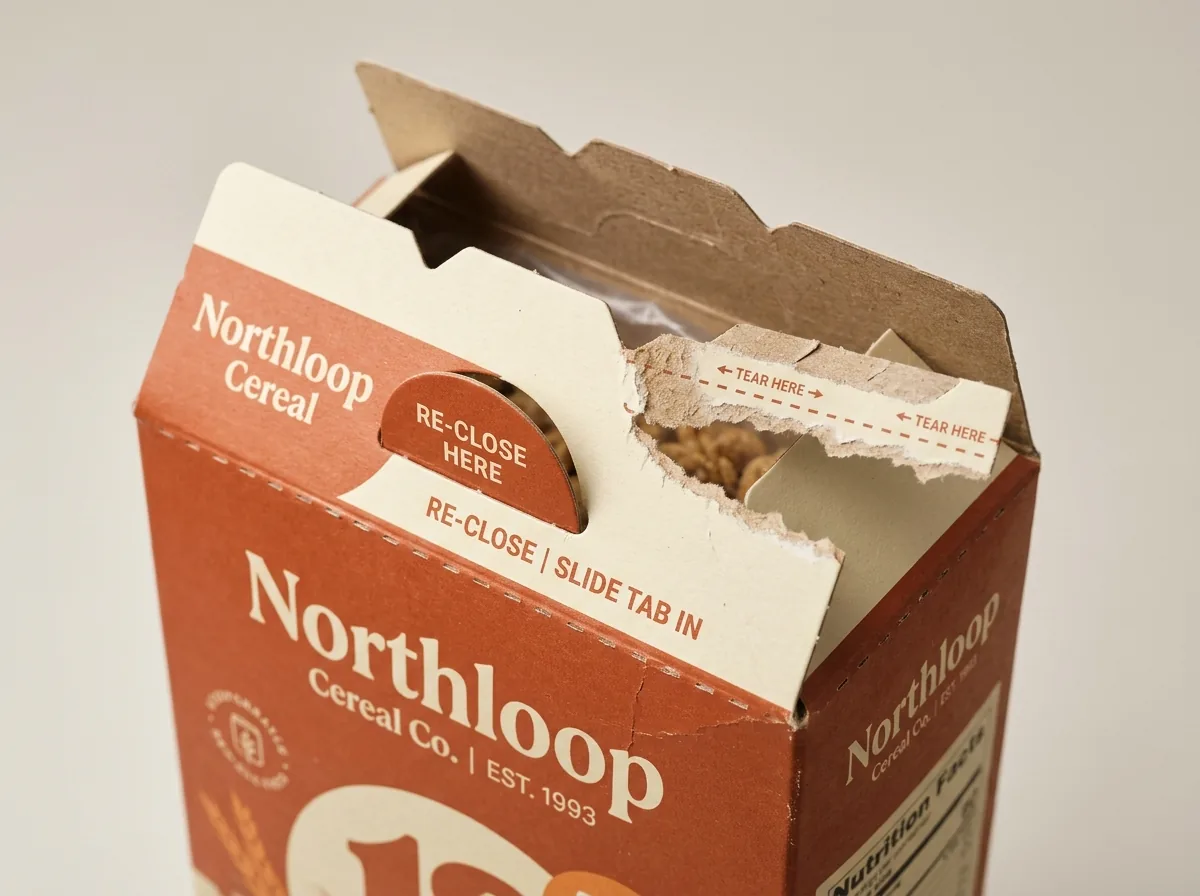
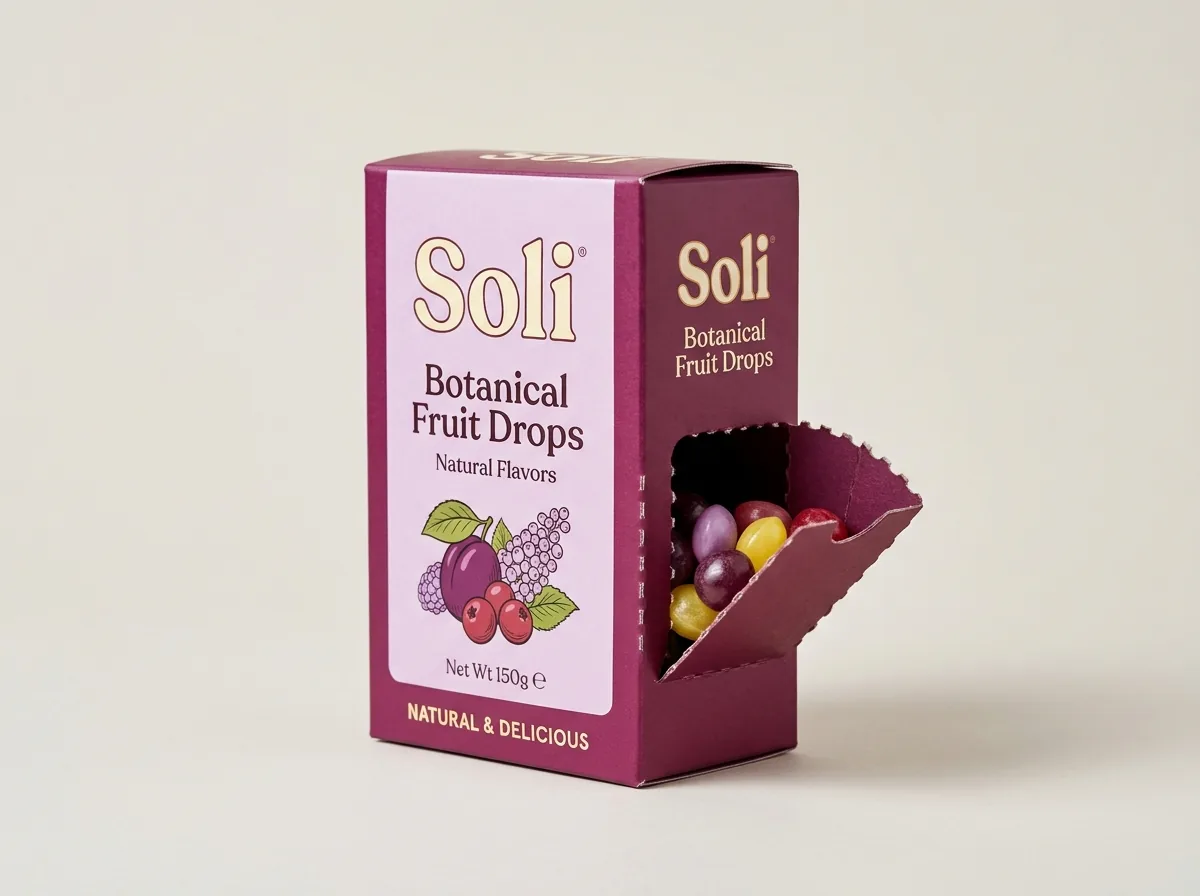
Because a glued seal end flap creates a permanent tamper-evident bond, adding a die-cut consumer opening mechanism ensures your customer never has to rip the top of the box apart. You can choose from three proven opening structures across custom cereal boxes, custom granola boxes, custom protein bar boxes, and custom candy boxes
- 1. Double-rule perforated zipper tear strip (10 to 14 mm wide): Two parallel lines of angled V-shaped die nicks run horizontally across the top outer major flap, starting at a projecting finger pull tab on the left or right edge. The angled nicks direct tearing forces inward between the two tracks so the strip zips straight across the lid without wandering.
- 2. Tab-in-slot pantry re-closure (the classic cereal box top): Positioned directly alongside the zipper tear strip, the outer top major flap features a die-cut curved tongue tab, while the underlying inner major flap features a matching horizontal receiving slot. Once the customer pulls the zipper tear strip to break the glue bond, the top lid hinges open and the tongue tab tucks into the inner slot to keep the box closed in the pantry.
- 3. Side-panel press-in pour spout: For theater candy, sprinkles, rice, or small crackers, we die-cut a perforated triangular gusset spout near the top of the Left or Right Side panel. The consumer presses a thumb tab inward and hinges the spout out to pour controlled portions without opening the top glue flaps at all.
Why must UV varnish and film lamination be masked off the inner major glue flaps and side seam?
The leading cause of seal end cartons popping open inside cold grocery warehouses or refrigerated delivery trucks is applying hot-melt or cold PVA glue over slick UV coating or plastic lamination film. Because aqueous coatings, UV varnishes, and BOPP laminates seal the microscopic pores of paperboard, liquid adhesive cannot penetrate into the cellulose fibers and forms a brittle surface bond that snaps under vibration or freezer temperatures. Here is how our prepress specialists engineer your glue-assist zones so every carton achieves a 100% fiber-tear bond
- Bare-fiber glue-assist knockout masks: On the top and bottom inner major flaps (as well as the longitudinal side glue seam), our dieline includes dashed glue-mask rectangles where all ink, aqueous coating, UV gloss, and matte/soft-touch film lamination are knocked out to bare white or kraft paperboard.
- Rotary score teeth (knurling / hatch cuts): On thick 22 pt to 24 pt paperboard or high-speed cartoning runs, we add shallow die-cut hatch marks across the bare glue-assist strips so molten hot-melt adhesive anchors mechanically deep into the board core.
- Keeping the center pantry slot glue-free: On cereal and granola boxes with a center tab-in-slot reclosure, the glue-assist knockouts are split into left and right pads flanking the center slot so glue never drips through the slot onto the inner food bag.
- Outboard placement alongside zipper tear strips: Whenever your top outer flap includes a perforated zipper tear strip and hinged pantry lid, we position the bare glue-assist strips strictly on the outboard margin beyond the zipper tracks so adhesive bonds the tear strip firmly while leaving the main lid free to swing open once the strip is pulled.
Know your size? Compare pricing across up to 3 quantities.
Request a Quote →How do I set up bleed, Nutrition Facts, UPC barcodes, and lot-code stamp windows on a seal end print file?
Whether you are designing custom snack boxes, custom cookie boxes, or custom popcorn boxes, follow this five-point prepress specification table before uploading your artwork
| Prepress element | Standard specification | Placement on seal end dieline | Production purpose |
|---|---|---|---|
| Exterior ink bleed | 0.125 in (3.175 mm) outside cut lines | All outer perimeter knife edges | Prevents unprinted white edges after die-cutting |
| Text & logo safe zone | 0.125 in (3.175 mm) inside scores & cuts | All 4 walls + outer top/bottom flaps | Keeps Nutrition Facts and copy off fold creases |
| Glue-assist knockout | 100% ink-, varnish-, and film-free | Side glue tab + inner major flap pads | Guarantees 100% fiber-tear tamper-evident bond |
| Lot / Best-By stamp box | 1.50 × 0.50 in bare unvarnished rectangle | Top outer flap or bottom outer flap | Allows crisp inkjet, laser, or dry-emboss coding |
| GS1 UPC-A barcode | Min 80% size (1.18 × 0.80 in), 100% K bars | Bottom outer flap or lower Right Side panel | Scans cleanly at supermarket checkout lanes |
How do I get a custom seal end dieline and 3D proof from CubitPack?
Ready to lay out your artwork? Read our companion guides on how to measure and choose board for seal end boxes and seal end boxes vs tuck end and auto lock bottom boxes. Every order of printed seal end cartons from CubitPack starting at 1,000 units includes free prepress support, zero die or plate charges, a custom 2D vector dieline, and an interactive 3D mockup before payment. Whether you are launching a single granola SKU or splitting a 10,000-unit run across four protein bar flavors that share the same cutting die, follow this 4-step prepress workflow
- Step 1: Enter your target Inside L × W × H, quantity (from 1,000 boxes), and board stock in our quote form; our structural team sends back a custom 2D vector dieline (.ai / PDF) with cut lines, score lines, zipper tear-strip perforations, tab-in-slot cuts, and glue-assist masks clearly layered.
- Step 2: Place your CMYK or Pantone artwork on the dedicated artwork layer (or send us your logo and nutrition copy and let our designers set up your print files for free), keeping any metallic foil stamping, embossing, or spot UV on separate 100% K vector spot layers.
- Step 3: Check that your FDA Nutrition Facts panel, ingredient list, GS1 UPC-A barcode, and unvarnished inkjet Best-By date window sit at least 0.125 inches (3.175 mm) inside all fold scores and perforated tear-strip tracks.
- Step 4: Review and approve your free 2D dieline proof and interactive 3D mockup before payment to confirm panel orientation, tear-strip pull direction, and bare glue knockout positions.
What are the most common dieline and prepress mistakes on seal end boxes?
Check your seal end carton artwork file against these five prepress errors before going to press
- Removing the glue-assist knockout masks on the inner major flaps and flooding the entire flap with UV gloss or soft-touch lamination, which prevents hot-melt or cold glue from bonding.
- Applying glue across the entire inner major flap instead of keeping adhesive on the outboard side of the zipper tear strip, which glues the tear-strip lid down so it cannot lift open.
- Placing small ingredient text or Nutrition Facts borders right across the perforated zipper tear strip or side pour spout.
- Forgetting to leave an unvarnished 1.5 × 0.5 inch white or kraft window on the top or bottom flap for your co-packer's inkjet Best-By / lot code printer.
- Orienting the outer bottom flap UPC barcode parallel to the feed direction in a way that crosses a score line instead of keeping it flat inside the safe margin.
Get a seal end dieline at your size
A simplified drawing for planning your design. Your free production dieline comes with your proof, made for your exact size and board.
Packaging for this
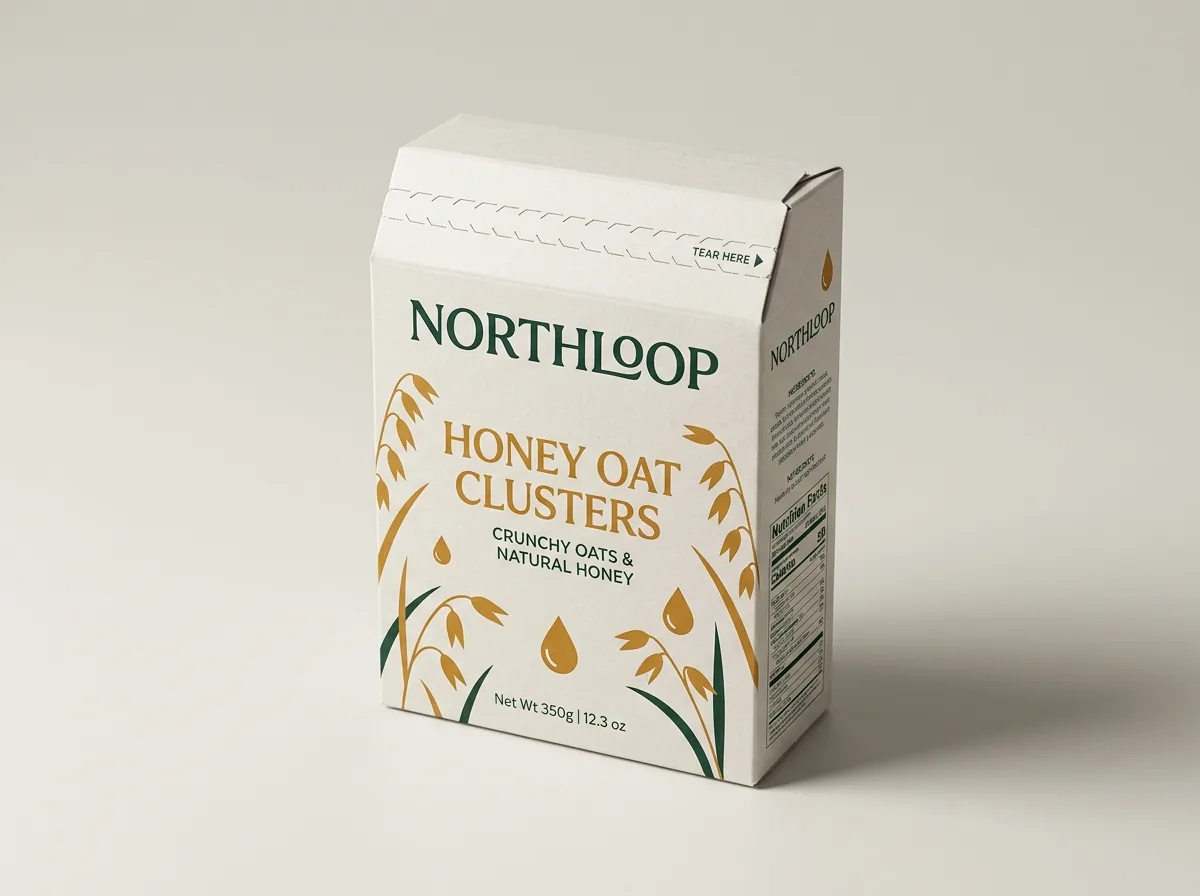

Ready to order seal end boxes? Compare up to 3 quantities with a free 3D mockup.
Request a Quote →Questions about seal end boxes
What is the ECMA code for a full-overlap seal end box dieline?
In the European Carton Makers Association (ECMA) standard, a full-overlap glued seal end folding carton is designated as ECMA A10.10.01.01.
Which major flap folds down first on a seal end box: the front flap or the back flap?
First, the two minor side dust flaps fold inward at 90 degrees. Second, the inner major flap (hinged to the Back wall) folds down flat, exposing its bare glue-assist knockout strips. Third, the outer major flap (hinged to the Front wall) folds backward over the glue so the front top edge facing shoppers is a clean, continuous fold.
How does a perforated zipper tear strip prevent tearing the rest of the lid?
A zipper tear strip uses two parallel rows of angled V-shaped die nicks spaced 10 to 14 mm apart. Because each nick points slightly inward toward the center of the strip, pulling the finger tab channels the tear cleanly between the two tracks from one end of the lid to the other.
Do I have to draw the glue-assist knockout masks and tear-strip perforations myself?
No. When you request a quote from CubitPack, our packaging specialists build the exact glue-assist varnish knockouts, zipper tear-strip perforations, and tab-in-slot reclosure cuts directly into your custom 2D vector dieline at no cost.
Can I combine soft-touch lamination or gloss UV on the exterior of a seal end box with unvarnished glue flaps?
Yes. We apply soft-touch film, matte/gloss lamination, or spot UV across the exterior display panels while masking the side glue seam and the inner major glue-assist pads bare so your adhesive bonds at full strength.
Still have a question? Ask a packaging specialist.
Request a Quote →Request your seal end boxes quote
Tell us your size and quantities, and one dedicated account manager prepares pricing for each tier.
- Free design & AI-to-print studio + 3D mockup
- No die or plate charges · 4–5 day rush available
- Free shipping to all 50 states
- 10% off your first order
We verified ECMA A10.10.01.01 full-overlap seal end dieline geometry, 10–14 mm zipper tear-strip nick rules, tab-in-slot reclosures, and glue-assist varnish knockout tolerances against European Carton Makers Association (ECMA) and Paperboard Packaging Council (PPC) technical manuals. A packaging specialist checked every specification. Spot something wrong? Tell us and we fix it.
Sources
What changed
- October 25, 2026: First published with ECMA A10.10.01.01 dieline breakdown, 3 consumer opening mechanisms diagram, inner major flap glue-assist map, and prepress table.
More guides
New packaging guides by email
Sizes, materials and design tips. Unsubscribe anytime.