
How do you design custom meal kit boxes, jar dividers, and recipe panels?
Short answer: Design the front panel around plated dish photography, prep time, and serving count, then put numbered cooking steps on the back or inside lid. When ordering custom meal kit boxes, keep all recipe flavors on one shared carton and divider dieline to combine print runs.
On this page
- How should you allocate artwork across every panel of a meal kit box
- What belongs on the front panel of a grocery dinner kit or refrigerated sleeve
- How do you print step-by-step cooking instructions inside the lid or sleeve
- How do multi-component ingredient lists and dual-column Nutrition Facts work on meal kits
- How do you standardize box and divider dielines across multiple recipes to cut costs
- Common mistakes
- FAQs
Request a custom quoteFree dieline & 3D mockup
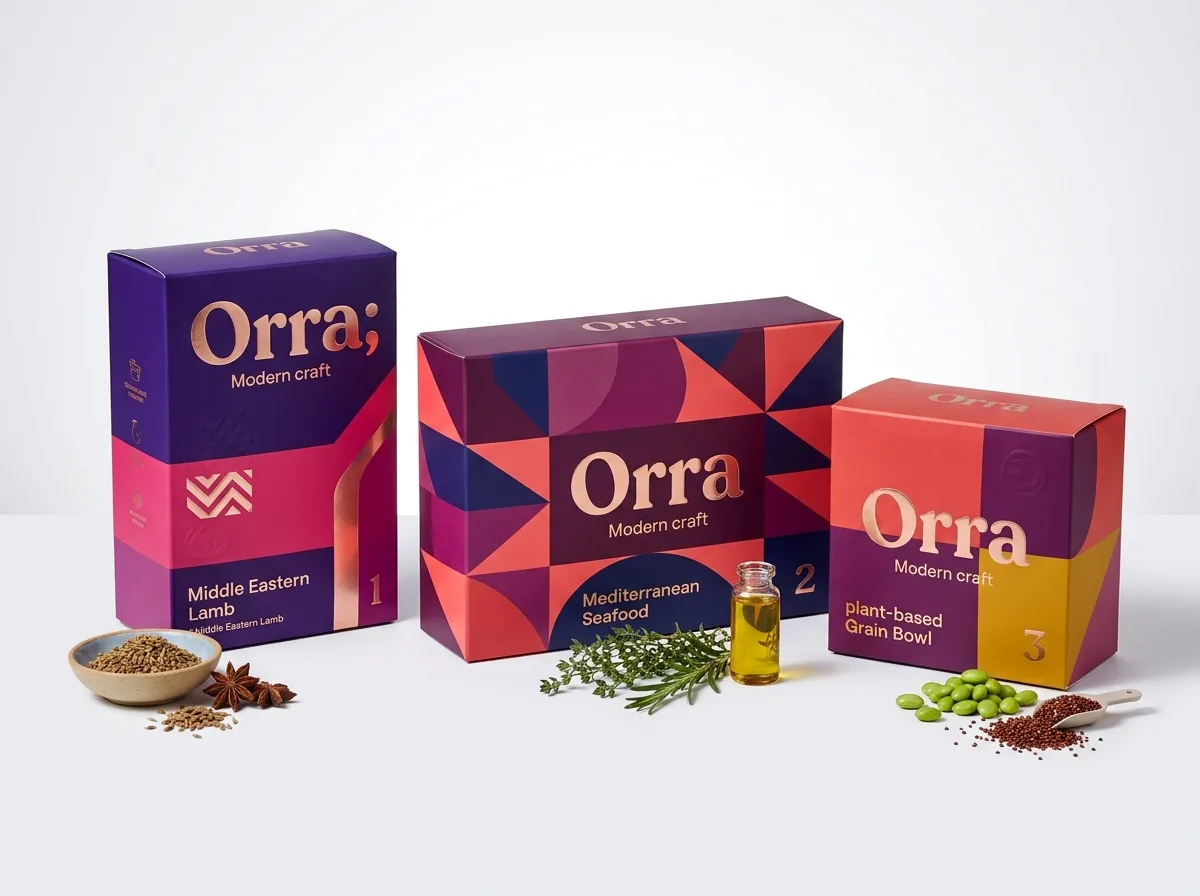
A meal kit box has to work first as a five-second billboard in the grocery aisle or refrigerated case and second as a clear culinary roadmap on the kitchen counter. On the Principal Display Panel (front face), shoppers look for four visual anchors in order: appetizing overhead photography of the finished dish, a bold badge showing total cook time and servings (for example, 'Ready in 20 Min · Serves 4'), a quick callout of what is included inside versus what the cook adds at home, and the FDA net weight statement in the lower third. On the back panel or inside mailer lid, numbered 3- to 4-step illustrated instructions and a QR cook-along video code replace loose paper sheets. At CubitPack, our prepress team builds your box and internal divider dielines for free before you pay.
How should you allocate artwork across every panel of a meal kit box?
Because a meal kit combines multiple ingredients that require home preparation, shoppers read far more of a meal kit carton before buying than they do on a simple snack box. They flip the box over to check whether they need to buy chicken breast, tofu, or heavy cream separately, how many pans the recipe uses, and whether the sauce contains soy, wheat, sesame, or peanuts. When laying out your custom printed meal kit cartons, assign each panel a distinct role so the front face stays clean and uncrowded while the back, side, and inside panels answer every kitchen question.
| Carton or sleeve panel | Primary visual & text elements | Prepress & compliance rule |
|---|---|---|
| Front (Principal Display Panel) | Brand logo, dish title, plated photo, prep time + servings badge, net weight | Keep net weight in bottom 30% per FDA 21 CFR 101 |
| Back panel (or top of sleeve) | What's Inside checklist, 'You Will Need' grocery add-ons, 3–4 visual cook steps | Use numbered icons + photos; include QR code to video |
| Right side gusset (Info Panel) | FDA Nutrition Facts (as packaged / as prepared), ingredients by component, allergens | Keep panel >= 2.5 in wide; use high-contrast dark text |
| Left side gusset | Spice-level meter, chef story, dietary badges (Gluten-Free, Plant-Based), storage tips | Repeat dish name vertically for sideways shelf stacking |
| Inside lid (mailers & sleeves) | Full step-by-step recipe timeline, plating tips, wine/drink pairing, social tag | Use low-odor ink; keep 1/8 in away from glue flaps |
| Bottom panel | UPC-A barcode, lot/best-by date stamp knock-out box, recycling instructions | Leave stamp box unlaminated so date ink dries fast |
What belongs on the front panel of a grocery dinner kit or refrigerated sleeve?
Shoppers browsing the grocery dinner-kit aisle or a refrigerated grab-and-go case make a simple mental trade-off: does this dish look restaurant-worthy, and can I actually cook it tonight in under 25 minutes? Overloading the front face with long chef biographies or ten dietary badges buries the two signals that drive the purchase. Dedicate 50% to 60% of the front panel to high-contrast overhead or 45-degree photography of the plated meal, highlighted with selective spot UV gloss over a smooth matte lamination so the sauce and garnishes pop under store LEDs. Place a high-contrast pill badge in the upper corner reading '20 Min · Serves 4 · Mild Spice' and include a small visual strip along the lower corner showing the included components (for example, 'Includes: Ramen Noodles + Miso Broth + Chili Oil').
How do you print step-by-step cooking instructions inside the lid or sleeve?
Printing separate 8.5 × 11 inch paper recipe sheets adds an extra inventory item to manage and slows down hand-packing lines. On E-flute custom mailer boxes and tear-open wrap-around tray sleeves, printing the cooking guide directly on the inside of the box turns the packaging itself into a standing kitchen easel. When a home cook opens a restaurant or DTC meal kit mailer on the counter, the upright inside lid sits right at eye level. Lay out your recipe in four numbered columns from left to right - 1. Prep, 2. Sear, 3. Simmer, 4. Plate - using at least 10-point type so cooks can read it from two feet away without touching the box with messy hands. Add a 1 × 1 inch QR code in the corner linking to a 60-second cook-along reel. On wrap-around paperboard tray sleeves for chilled meals, you can also print a microwave and oven heating chart on the inside surface of the sleeve with a perforated pull-strip so diners tear the band open and read the full heating tips.
- Use a 4-column horizontal grid inside mailer lids so cooks read left to right at counter distance.
- Highlight time and temperature numbers in bold colored badges (e.g., '400 °F · 12 Min') inside each step.
- Color-code ingredient names in the recipe text to match the colored labels on your inner spice sachets and sauce jars.
- If customers collect recipes in a binder, add a perforated tear-out card panel or pair the box with custom insert cards.
Know your size? Compare pricing across up to 3 quantities.
Request a Quote →How do multi-component ingredient lists and dual-column Nutrition Facts work on meal kits?
Meal kits have a unique FDA labeling layout compared with single-ingredient foods. Because a dinner kit contains separate sealed components - such as a pouch of rice noodles, a jar of pad thai sauce, and a packet of roasted peanuts - the ingredient statement on the right-hand Information Panel is typically organized by component heading (for example, 'Noodles: Rice, Water. Sauce: Tamarind, Cane Sugar, Soy Sauce...'). In addition, if the recipe requires the customer to add oil, butter, milk, or protein during cooking, many brands print a dual-column FDA Nutrition Facts panel showing values 'As Packaged' in the first column and 'As Prepared' in the second column. Because a dual-column table and a multi-part ingredient list take up extra horizontal space, keep your carton side gusset at least 2.75 to 3.5 inches wide. When you pair your carton with inner jars or pouches that also carry custom food labels, keeping the allergen summary consistent across both the inner label and outer carton prevents retail compliance delays.
How do you standardize box and divider dielines across multiple recipes to cut costs?
Most meal kit brands launch with three to six flavors - such as Pad Thai, Coconut Green Curry, Dan Dan Noodles, and Teriyaki Udon - rather than a single SKU. If you engineer a slightly different carton size and a different custom cardboard insert for every recipe, your co-packer has to re-adjust carton rails between flavors and you lose multi-design quantity breaks. Instead, size one shared outer carton (for example, 8.5 × 3.5 × 9.5 inches) and one universal internal paperboard divider around your largest jar and bulkiest dry pouch. You can then order 1,000, 2,500, or 5,000 cartons split across multiple recipe designs on the exact same cutting die with zero die charges, while ordering the unprinted internal dividers in one consolidated bulk run. Keeping the front window cutout or tear-strip zipper in the identical spot across every flavor also means your packing crew follows one repeatable folding routine for every dish.
- One shared outer carton dieline: combine 3 or 4 recipe artworks in a single order to unlock lower per-unit pricing.
- One universal unprinted divider: use the same natural kraft or white paperboard partition across every flavor.
- Color-coded top flaps: assign each recipe a distinct Pantone top-flap color so warehouse pickers spot flavors instantly.
- Unvarnished best-by stamp window: keep the bottom date-code patch in the exact same spot across all SKUs for automated ink-jet coding.
What are the most common meal kit box design and prepress mistakes?
Avoid these five frequent artwork and structural layout mistakes before sending your meal kit dieline to press
- Hiding the fact that fresh meat, eggs, or dairy must be purchased separately, which frustrates shoppers when they open the kit at home.
- Designing a narrow 2.0-inch side panel that squeezes a dual-column Nutrition Facts table and multi-component ingredient list into illegible tiny type.
- Using small 7-point text for inside-lid cooking instructions so home cooks cannot read the recipe from across the kitchen counter.
- Creating a different carton size and divider dieline for each recipe flavor instead of sharing one master structure across your menu.
- Placing matte or gloss lamination over the bottom best-by date stamp box, causing ink-jet or rubber-stamp batch codes to smear.
Find your size
Suggested inside size: 7.5 × 5.5 × 1.75 in
A starting point. Your account manager confirms the size with you before the proof.
Quote this size →Packaging for this

Ready to order meal kit boxes? Compare up to 3 quantities with a free 3D mockup.
Request a Quote →Questions about meal kit boxes
Where should the prep time, serving count, and 'what you add' list go on a meal kit box?
Place a bold prep-time and serving-count badge in the upper corner of the front Principal Display Panel so shoppers see it at a glance. Put a clear two-column 'What's Inside vs What You Need at Home' box at the top of the back panel so buyers know what fresh items to pick up.
How do you list ingredients on a meal kit that contains three separate pouches or jars?
Group the ingredients on the side Information Panel under bold sub-headings for each component inside the kit - for example, 'Pasta:', 'Simmer Sauce:', and 'Seasoning Packet:' - followed by a combined bold allergen summary line at the bottom.
Can I print the recipe inside the box instead of inserting a separate printed card?
Yes. Printing a 4-step illustrated recipe timeline and QR video code on the inside lid of a mailer box or inside a tear-open tray sleeve eliminates a separate paper card SKU and stands upright on the counter while cooking.
How wide should the side panel be if my meal kit uses a dual-column Nutrition Facts table?
Keep the side gusset at least 2.75 to 3.5 inches wide if you plan to place a dual-column ('As Packaged' and 'As Prepared') FDA Nutrition Facts panel on the side of the carton. On narrower boxes, place the table on the back panel.
Can I combine 4 different meal kit flavors in one 1,000-box or 2,500-box order?
Yes. Select 2 designs or 3+ designs in the quote form and keep all flavors on the exact same inside Length × Width × Height dieline. We run your artwork variations together with zero die or plate charges.
What if I do not have a structural dieline for the internal sauce-jar divider?
Send us the dimensions or physical samples of your sauce jar, dry pouches, and sachets. Our design team draft both the outer box dieline and the matching internal paperboard divider for free, and you approve a 3D mockup before paying.
Still have a question? Ask a packaging specialist.
Request a Quote →Request your meal kit boxes quote
Tell us your size and quantities, and one dedicated account manager prepares pricing for each tier.
- Free design & AI-to-print studio + 3D mockup
- No die or plate charges · 4–5 day rush available
- Free shipping to all 50 states
- 10% off your first order
The panel hierarchy, inside-lid typography rules, and FDA multi-component labeling guidelines in this article follow 21 CFR 101 food-labeling rules and retail meal-kit prepress checks. A CubitPack packaging specialist reviewed every section. Spot an error? Let us know and we will fix it.
Sources
What changed
- October 22, 2026: First published.
- October 22, 2026: Updated specifications, terminology, and verified source links.
More guides
New packaging guides by email
Sizes, materials and design tips. Unsubscribe anytime.