
How do rigid box dielines, 18 mm paper wrap turn-ins, and 90-degree V-grooving work?
Short answer: Unlike a one-layer folding carton, custom rigid boxes use two separate dielines: a structural 1.5–3.0 mm grayboard template with 90-degree V-grooves, and an outer 120–157 gsm printed paper wrap template with a 15–20 mm (0.6–0.8 in) turn-in margin that folds over the top rim and glues inside the wall.
On this page
- Why does a rigid box dieline have a chipboard layer and a paper wrap layer
- What is 90-degree V-grooving and why does it matter on luxury boxes
- Which wrap papers, laminations, and special finishes work best on rigid boxes
- How do I design two-tone colorways across the lid, base, and inner neck
- What is the 5-step prepress checklist before approving a rigid box proof
- Common mistakes
- FAQs
Request a custom quoteFree dieline & 3D mockup
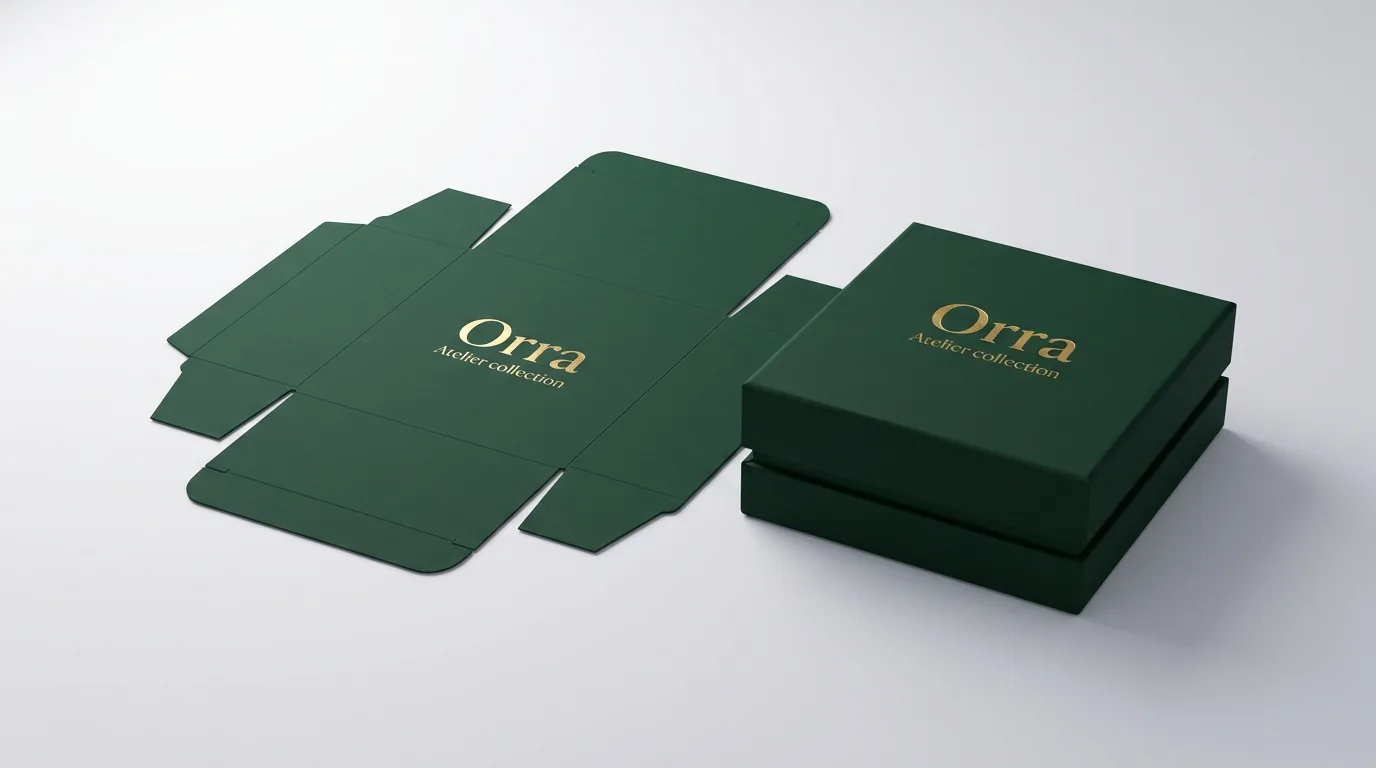
When you open a flat dieline template for a custom rigid setup box, you will see two nested outlines for each piece (such as the lid and the base tray): the inner structural chipboard die and the larger outer paper wrap die. Because 1.5 mm to 3.0 mm (60 pt to 120 pt) grayboard is too thick to run through an offset printing press, your CMYK or Pantone graphics, soft-touch lamination, metallic foil stamping, and spot UV are printed onto a separate 120 to 157 gsm art or kraft paper sheet first. Simultaneously, the raw grayboard is die-cut, routed with 90-degree V-grooves along the four wall fold lines, and locked at the corners with heat-activated stay tape. Automated wrapping rollers then glue the printed paper wrap across the exterior walls and fold the 15 to 20 mm turn-in flaps over the top rim onto the inside wall, hiding every raw board edge.
Why does a rigid box dieline have a chipboard layer and a paper wrap layer?
Every template we build for rigid boxes separates the unprinted structural skeleton from the printed decorative wrap. Here is how each line and zone on the flat template works
- Structural Chipboard Core (Inner Black & Blue Lines): Shows the central base or lid ceiling panel surrounded by four vertical side walls. The dashed blue lines mark where 90-degree V-grooves are routed into the 1.5–3.0 mm grayboard, while the four square corner notches are punched out entirely so the walls fold up into a 3D tray.
- Outer Paper Wrap Cut Line (Outer Solid Green/Black Outline): Sits 15 to 20 mm (0.60 to 0.80 inches) outside the four chipboard walls and features angled corner miter cuts ('dog-ears') at all four corners so the paper wraps around the 90-degree corners without bunching or overlapping.
- 15–20 mm Turn-In Margin + 3 mm Bleed: The 15 to 20 mm strip around all four sides folds over the top rim of the rigid wall and glues down inside the tray. Always extend your background color or pattern across the entire turn-in strip plus 3 mm (1/8 inch) of outer bleed.
- Interior Liner Sheet (Separate Flat Dieline): A separate printed or solid-colored paper liner glues across the inside floor (and inner wall) overlapping the outer wrap turn-in by 3 to 5 mm so the interior looks completely finished.
What is 90-degree V-grooving and why does it matter on luxury boxes?
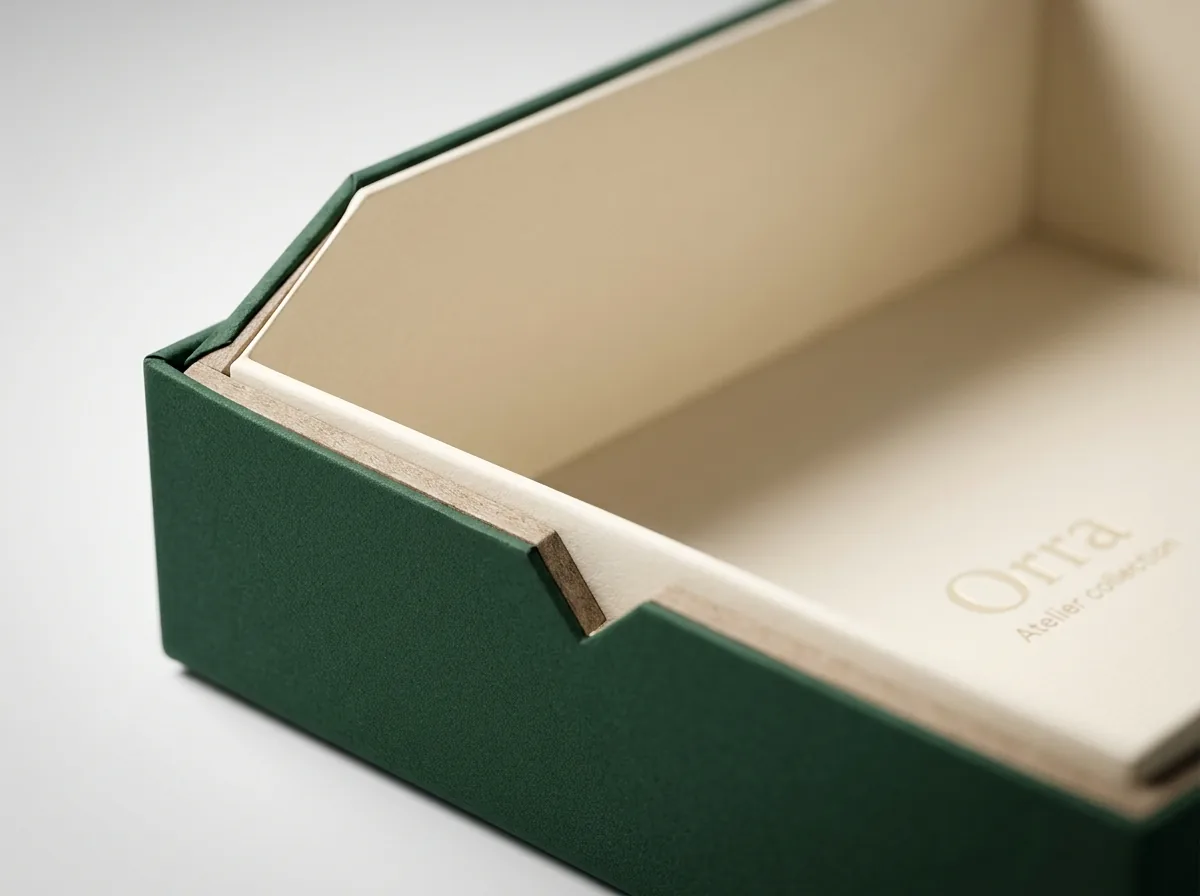
If you bend a thick 2.0 mm (80 pt) piece of chipboard along a standard compression score rule, the compressed inner fibers push outward and create a rounded, pillowy corner radius. V-grooving solves that physics problem
- Routing a 90-degree V-channel: Precision rotary blades carve a V-shaped trench through 75% to 80% of the chipboard thickness along each fold line, removing the wedge of inner fiber while leaving a thin outer layer intact as a hinge.
- Zero-radius architectural edges: When the four tray walls fold upward at 90 degrees, the two angled faces of the V-groove meet flush like a mitered picture frame, creating a crisp, square 90-degree exterior edge that looks like solid milled wood or stone.
- Smoother foil and wrap lamination: Because there is no bulging corner bead, the laminated outer wrap paper lies completely flat right up to the corner edge without wrinkling.
Which wrap papers, laminations, and special finishes work best on rigid boxes?
Because the 1.5–3.0 mm grayboard core provides an unyielding anvil underneath the wrap paper, rigid setup boxes support deeper tactile finishes than any thin folding carton
| Wrap & finish option | Spec & prepress setup | Visual & tactile impact | Best luxury box pairing |
|---|---|---|---|
| 157 gsm C2S art wrap + Soft-Touch | CMYK or Pantone flood coat + velvet BOPP film lamination | Ultra-matte rose-petal hand feel; zero corner cracking on dark colors | Perfume, cosmetics, watches, spirits, and dark flood-coated boxes |
| Unbleached natural kraft wrap | 120–140 gsm brown kraft wrap · 1–2 dark Pantone inks or foil | Warm organic fiber texture with rigid 90° V-grooved architecture | Botanical skincare, artisan candles, footwear, eco-luxury gifts |
| Deep blind debossing | 100% vector spot layer (DEBOSS) · Minimum 0.25 in from edges | Brass die presses a deep recessed sculptural relief into the thick board | Monogram crests, emblem borders, and minimalist quiet-luxury lids |
| Hot metallic foil stamping | 100% vector spot layer (FOIL) · Minimum 0.5 pt (0.18 mm) line weight | Mirror gold, silver, rose gold, or copper foil recessed into the wrap | Brand wordmarks, front magnetic flap taglines, and inside-lid greetings |
Know your size? Compare pricing across up to 3 quantities.
Request a Quote →How do I design two-tone colorways across the lid, base, and inner neck?
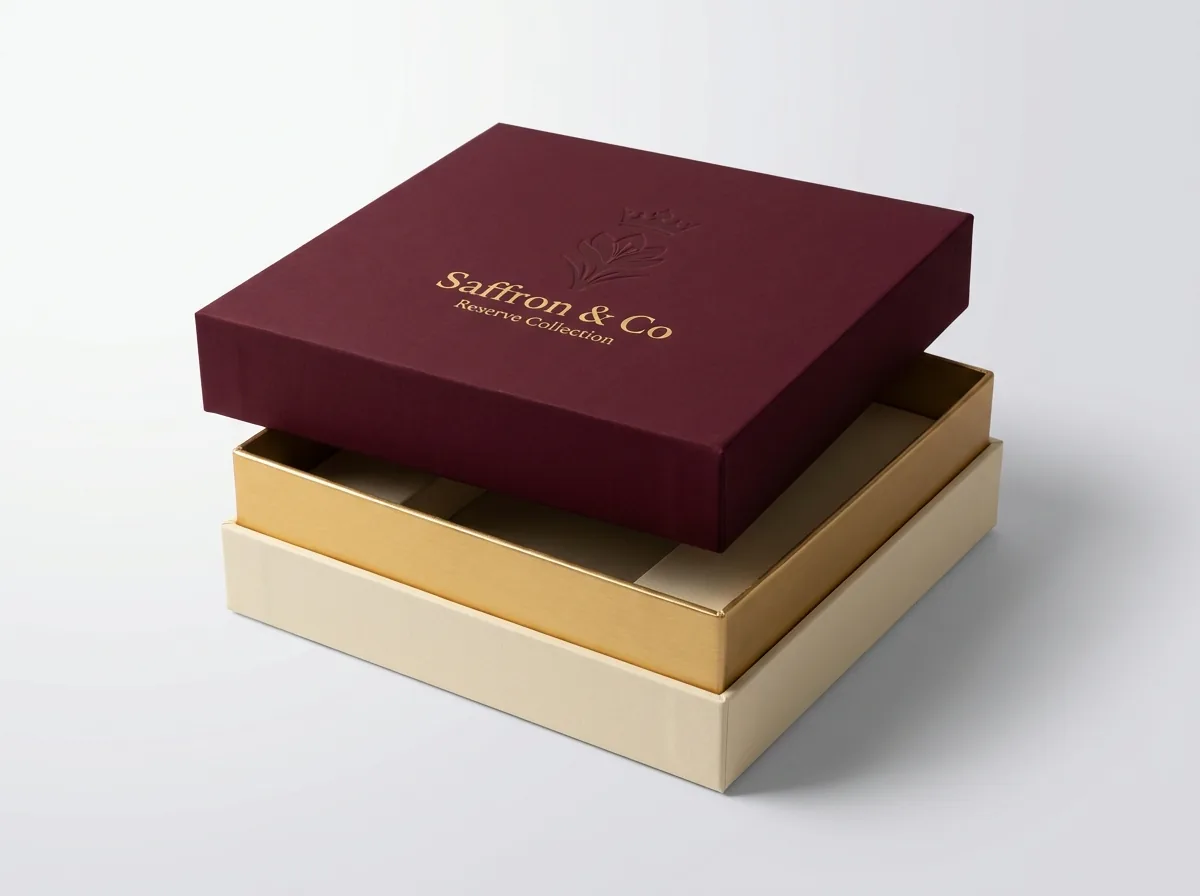
Whether you are designing custom perfume boxes, custom jewelry boxes, custom watch boxes, or custom spirits boxes, one of the biggest creative advantages of a rigid setup box is that each component uses its own separate paper wrap sheet
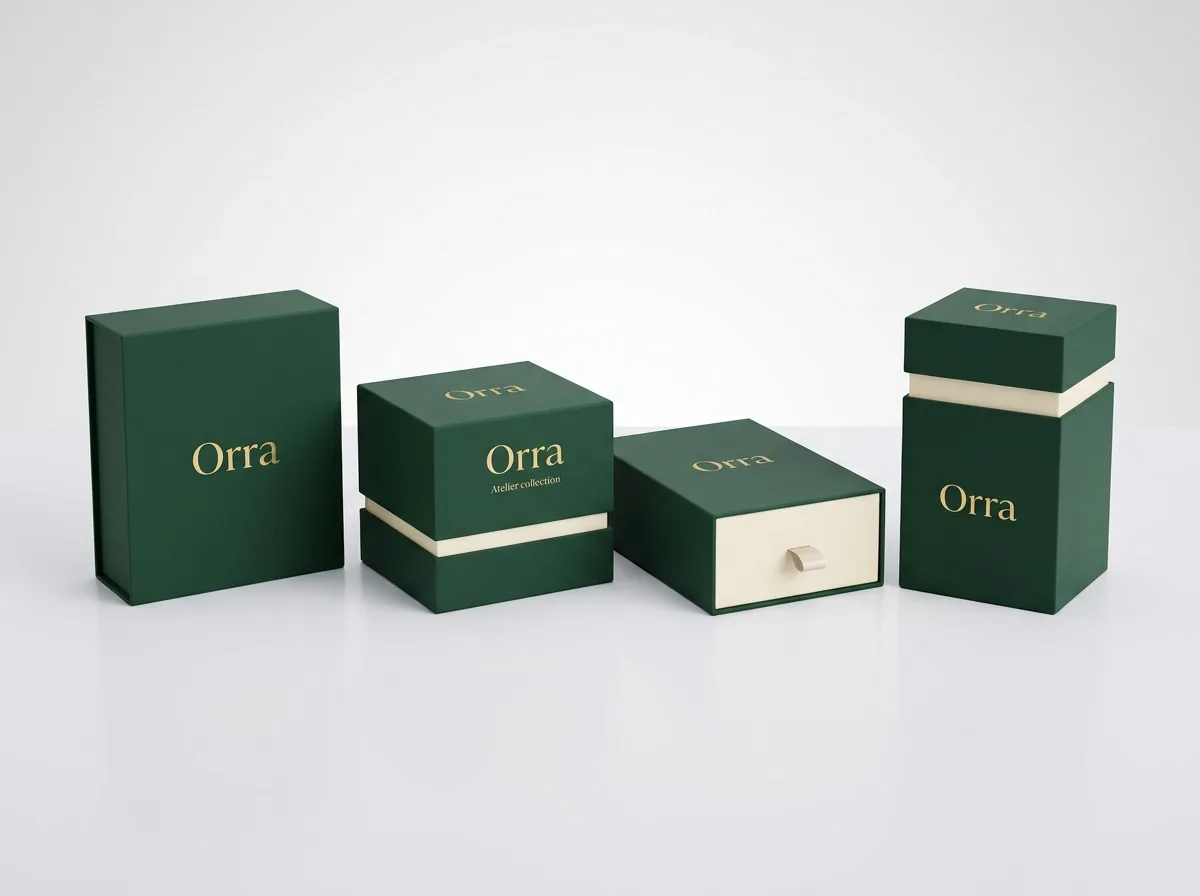
- Contrasting Lid and Base Wraps (Two-Piece & Shoulder Neck): Wrap the telescoping top lid in deep forest green, burgundy, or matte black soft-touch paper, and wrap the lower base tray or exposed inner shoulder neck in warm cream or metallic gold paper at zero extra die cost.
- Contrasting Outer Sleeve and Inner Drawer (Slide Drawer Boxes): Pair a minimalist neutral outer sleeve with a vibrant Pantone-printed inner drawer tray and color-matched satin ribbon pull tab.
- Printed Inside Lid Ceiling (Magnetic & Book-Style Boxes): Print a step-by-step ritual guide, fragrance pyramid, or metallic foil founder note on the inside lid liner sheet that faces the customer when the cover swings open.
- Plan your size and structure together: Read how to measure and choose board for rigid boxes and magnetic vs two-piece vs drawer vs shoulder neck rigid boxes to finalize your complete spec.
What is the 5-step prepress checklist before approving a rigid box proof?
Every custom rigid box order at CubitPack starts at 50 units with 10–14 business day standard turnaround (4–5 day rush available), free 2D vector dielines and 3D digital proofs before payment, zero die or plate charges, and free US shipping.
- 1. Artwork placed on the outer Paper Wrap template layer in CMYK color mode or named Pantone (PMS) spot colors, with all typography converted to vector outlines and linked raster images embedded at 300 DPI or higher.
- 2. Background colors and patterns extended across the full 15 to 20 mm (0.60 to 0.80 inch) wrap turn-in flaps plus 3 mm (1/8 inch) of exterior bleed past the outer wrap cut line and corner miter notches.
- 3. Brand logos, small body text, and blind-deboss dies kept at least 0.25 inches (6 mm) inside all 90-degree V-grooved fold lines and at least 0.5 inches clear of any recessed neodymium magnet pockets.
- 4. Soft-touch velvet or smooth matte BOPP film lamination selected whenever dark solid ink (such as black, deep navy, burgundy, or forest green) crosses the V-grooved corners and turn-in rims.
- 5. Hot metallic foil stamping, deep blind debossing, and high-build spot UV supplied on dedicated 100% solid vector spot-color layers set to Overprint Fill so every finish registers cleanly.
What are the most common dieline and wrap mistakes on rigid boxes?
Check your artwork file against these five rigid setup box prepress errors before going to production
- Stopping background colors at the chipboard wall edge instead of extending them across the 15–20 mm turn-in margin, which leaves an unprinted white rim around the top inside edge of the tray.
- Printing a dark solid black, navy, or forest green wrap on uncoated paper without matte or soft-touch film lamination, causing white paper fibers to show along the sharp 90-degree V-grooved corners.
- Placing a deep metal blind-deboss die directly over the recessed neodymium magnet pockets on a magnetic closure flap, which can crack the magnet or dent the flap.
- Putting fine serif text or thin border lines within 1/8 inch of a V-grooved corner edge, where the paper wrap turn-in tension can slightly pull the line.
- Orienting front-flap typography right-side up on the flat unfolded magnetic case template, which causes the text to read upside down when the lid folds closed over the front wall.
Packaging for this



Ready to order rigid boxes? Compare up to 3 quantities with a free 3D mockup.
Request a Quote →Questions about rigid boxes
What is the turn-in allowance on a custom rigid box paper wrap?
The turn-in allowance is the 15 to 20 mm (0.60 to 0.80 inch) border of printed outer wrap paper that extends past the top edge of the rigid chipboard walls. During assembly, automated rollers fold that margin over the top rim of the tray and glue it down onto the inside wall before the inner liner is applied.
Why do rigid boxes have sharper corners than folding cartons?
Rigid setup boxes use 90-degree V-grooving, where a V-shaped channel is routed partway through the 1.5 mm to 3.0 mm chipboard core along every fold line. Removing that inner wedge of board allows the walls to meet at a crisp, zero-radius 90-degree mitered corner.
Can I blind-deboss a logo deeply into a rigid box lid without it showing on the inside?
Yes. Because the outer paper wrap is stamped and debossed before being laminated onto the thick 60 pt to 120 pt grayboard core, and because the inside lid ceiling is covered by a separate inner liner sheet, deep blind debossing never leaves an indentation on the inside of the lid.
Do I need to calculate the paper wrap corner miters and turn-in flaps myself?
No. Simply enter your usable inside tray dimensions (Length × Width × Height) when you request a quote. Our packaging specialists generate the exact 2D vector dieline with pre-calculated chipboard walls, V-grooves, corner miters, and 18 mm wrap turn-ins for free.
Will I receive a 3D mockup of my wrapped rigid box before production?
Yes. Every order at CubitPack includes a free 2D vector dieline proof and an interactive 3D digital mockup showing your exterior wrap, interior liner, foil or deboss placement, and foam insert before you pay.
Still have a question? Ask a packaging specialist.
Request a Quote →Request your rigid boxes quote
Tell us your size and quantities, and one dedicated account manager prepares pricing for each tier.
- Free design & AI-to-print studio + 3D mockup
- No die or plate charges · 4–5 day rush available
- Free shipping to all 50 states
- 10% off your first order
We verified 15–20 mm paper wrap turn-in tolerances, corner miter geometry, 90-degree V-grooving depth (75%–80% of board caliper), and foil/deboss vector prepress specifications against Paperboard Packaging Council (PPC) setup box manufacturing guidelines. A packaging specialist checked every specification. Spot something wrong? Tell us and we fix it.
Sources
What changed
- October 24, 2026: First published with 2-layer chipboard + paper wrap dieline diagram, 18 mm turn-in cross-section, 90° V-grooving diagram, and 5-step prepress checklist.
More guides
New packaging guides by email
Sizes, materials and design tips. Unsubscribe anytime.