
How do you engineer dispenser box cut-tie perforations and reclosable flap dielines?
Short answer: Match steel-rule cut-to-tie blades to board weight and coating (2:1 mm for parcel-shipped 24 pt boxes, 2.5:0.8 mm for film-laminated cartons, 3:1 mm for light 18 pt boxes), add a 14 mm thumb starter notch, and keep barcodes and foil 5 mm clear of the tear line.
On this page
- Which steel-rule cut-to-tie ratio balances parcel strength with clean fingertip tearing
- Should your dieline use a 4-sided tear-away hatch or a reclosable catch-tray flap
- How do you lay out artwork, foil stamping, and barcodes around a tear-out panel
- How does CubitPack verify your dispenser dieline before full production
- How do dual-chamber dividers and side gauge slots integrate into the dieline
- Common mistakes
- FAQs
Request a custom quoteFree dieline & 3D mockup
The difference between custom dispenser boxes that zip open like a luxury tear strip and cartons that either burst inside UPS shippers or rip ugly white paper scars across your brand logo comes down to millimeter-level steel-rule die engineering. Every perforated line on a folding carton balances two opposing forces: uncut fiber bridges ('ties') must stay strong enough to hold stacked bars or capsules secure during warehouse drops, yet short enough that a single fingertip pull breaks them sequentially along the intended track without wandering into surrounding artwork. When you add BOPP matte or soft-touch film lamination, metallic foil stamping, or a reclosable scoop tray, die blade spacing and prepress safe zones become even more critical. CubitPack calibrates custom dispenser dielines and 3D digital proofs free from 1,000 boxes, with zero die setup charges and free US delivery.
Which steel-rule cut-to-tie ratio balances parcel strength with clean fingertip tearing?
On a flat steel-rule cutting die, a perforation blade alternates sharp through-cutting segments with ground-out gaps that leave tiny paperboard bridges intact. Expressed in millimeters as Cut: Tie, a 3:1 rule slices 3 mm of board and leaves a 1 mm fiber tie, removing 75% of the line while retaining 25% holding strength. Heavier 24 pt cartons packed with dense protein bars exert far higher internal burst pressure during parcel transit than feather-light herbal tea envelopes, while stretchy BOPP laminating films refuse to snap cleanly unless ties are kept sub-millimeter narrow. Review our prepress blade chart below
- Align horizontal tear lines with board grain: Paperboard tears straightest parallel to fiber grain, preventing upward runaway rips into the main brand logo.
- Anchor corners with 90-degree radius curves: Rounding the corners of a tear-out panel with a 4 to 6 mm radius guides the tear smoothly around turns instead of stalling at sharp corners.
- Laminate the exterior face only: Leaving the interior carton surface unlaminated ensures clean inner fiber separation and preserves low friction on the gravity slide ramp.
| Board caliper & exterior finish | Recommended Cut : Tie rule | Starter notch design | Real-world tear & transit behavior |
|---|---|---|---|
| 18 pt Aqueous-Coated SBS | 3.0 mm cut: 1.0 mm tie | 14 mm half-moon thumb notch | Effortless one-finger zip for light tea & sample sachets |
| 20–24 pt Matte / Soft-Touch Film | 2.5 mm cut: 0.8 mm tie | Through-cut starter slit + arc | Snaps BOPP film cleanly without stretching or peeling |
| 20–24 pt Unbleached Natural Kraft | 3.0 mm cut: 1.0 mm tie | Dual parallel zipper pull tab | Slices long virgin kraft fibers cleanly without fuzz |
| 24 pt Heavy Card (Parcel Shipped) | 2.0 mm cut: 1.0 mm tie | Reinforced corner ties + notch | 33% fiber hold prevents pop-open in e-commerce transit |
| 1.5 mm Printed E-Flute Tower | 3.0 mm cut: 1.5 mm tie | Finger-grip tear strip tab | Holds 30–40 coffee pods or 16 heavy bars securely |
Should your dieline use a 4-sided tear-away hatch or a reclosable catch-tray flap?
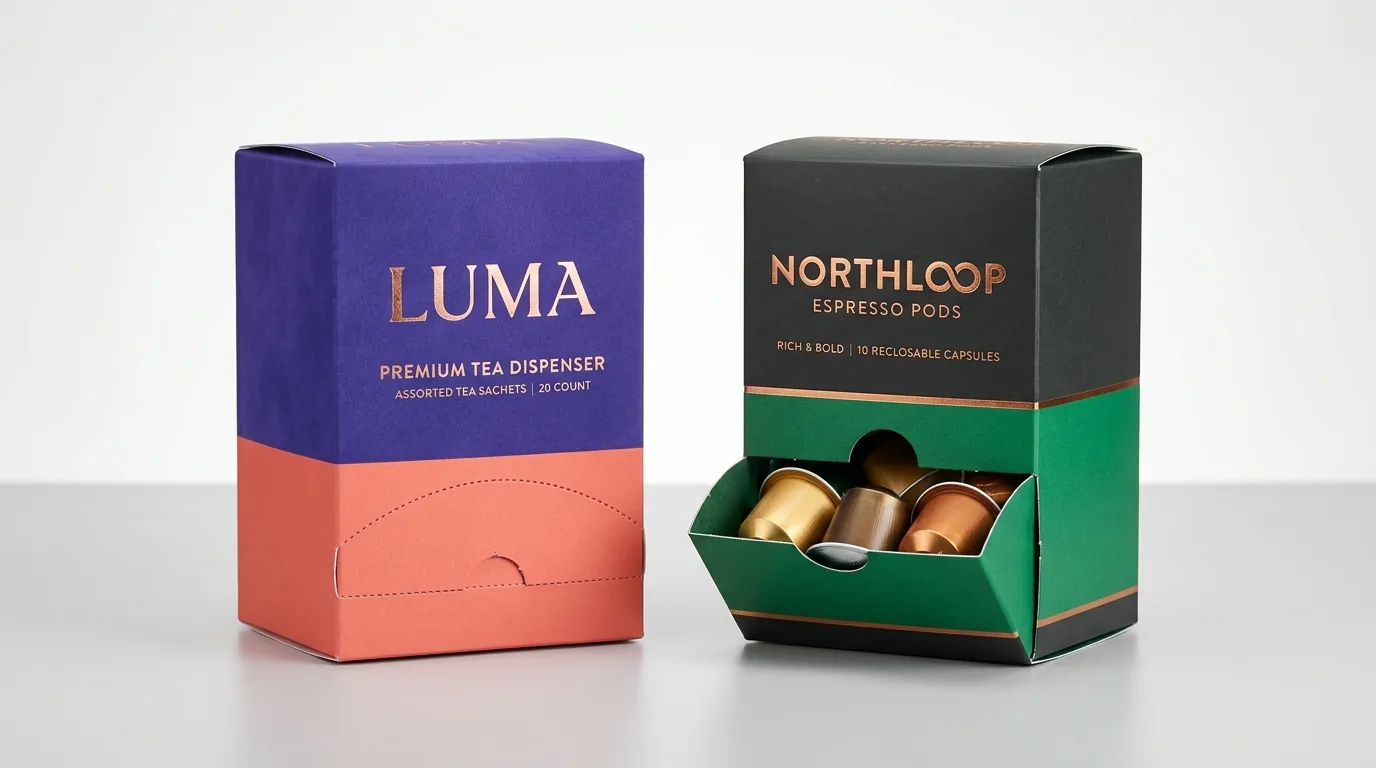
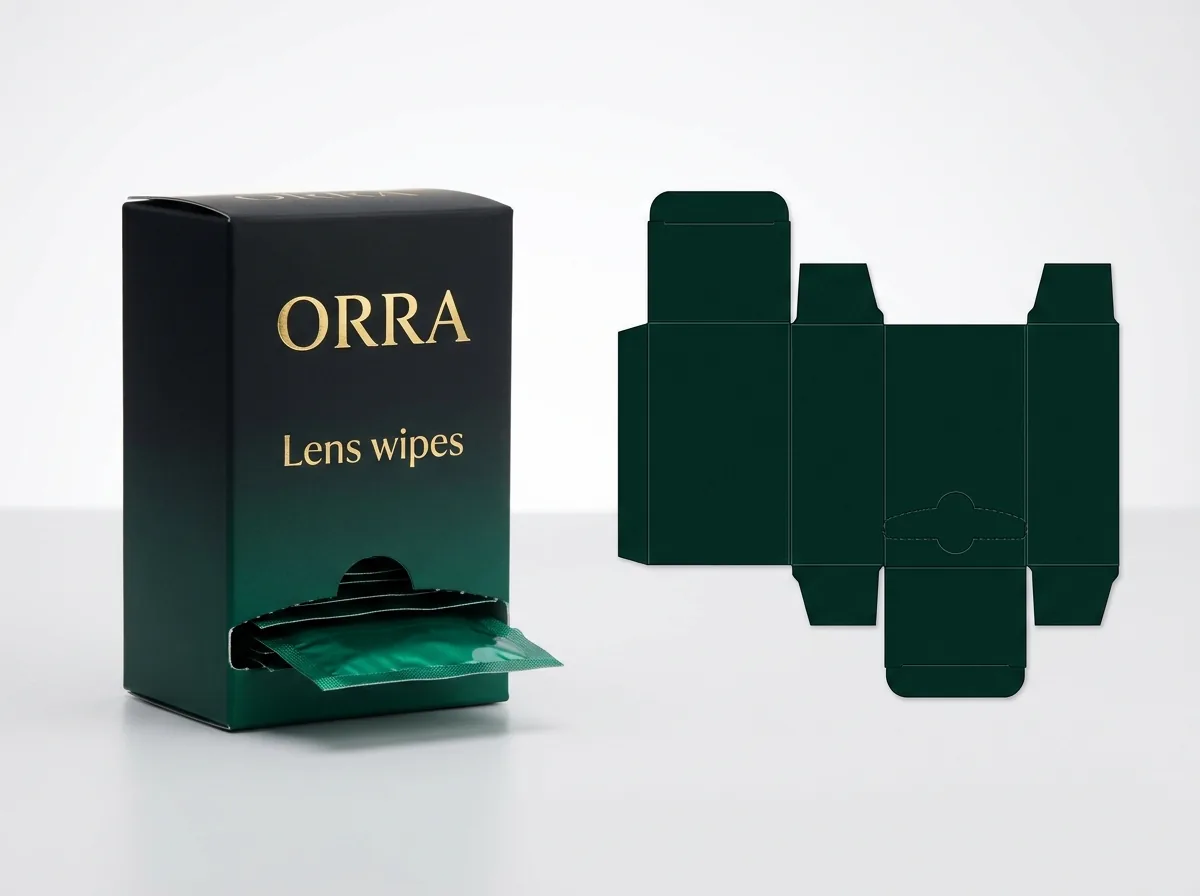
Not every gravity-feed dispenser carton discards its perforated front piece. Depending on whether your inner product lies flat like an envelope or rolls freely like a capsule or chocolate ball, CAD engineers choose between two distinct mouth geometries. Pattern A removes a clean rectangular or arched window above a fixed bottom sill so fingers pinch flat packets directly; Pattern B perforates only the top and side edges while creasing the bottom edge with two folding side gusset ears, creating a miniature 45-degree drawbridge scoop tray that pushes flush closed between uses
| Aperture CAD pattern | How it opens & operates | Best inner products | Pantry & shelf advantage |
|---|---|---|---|
| 4-sided tear-away slot + sill | Panel zips off completely and discards | Tea bags, hydration sticks, sheet masks, bars | Zero protruding flap on tight grocery shelf edges |
| Hinged fold-down scoop tray | Top/sides zip; bottom crease + side ears cradle | Round espresso pods, wrapped candies, gummies | Catches rolling items and pushes shut against dust |
| Wrap-around front-and-side mouth | Perforation extends 15 mm onto both side walls | Wide cosmetic masks & rigid mini sample boxes | Lets thumb and forefinger grip wide edges easily |
How do you lay out artwork, foil stamping, and barcodes around a tear-out panel?
Graphic layout on a perforated dispenser dieline requires one golden rule: treat the removable hatch as temporary packaging that disappears five seconds after unboxing. We routinely catch incoming client files where the UPC retail barcode, FDA Supplement Facts panel, expiration lot stamp, or the bottom half of a metallic foil crest crosses the red perforation layer. Before sending files for custom gummy boxes, custom face mask boxes, custom protein bar boxes, or custom coffee pod boxes, check these four prepress zones
- Keep mandatory copy in the permanent upper or back zones: Place net weight, ingredient declarations, nutrition tables, allergen callouts, lot coding areas, and UPC/QR codes strictly on the permanent upper tower face, side panels, or back wall.
- Hold hot foil stamping and deep embossing 5 mm clear of perforations: Metallic foil mylar bridged across a cut-tie blade flakes at the nick points; keeping a 5 mm safety margin preserves razor-crisp metallic edges.
- Print a clear visual pull cue on the tear hatch: Use a contrasting color block, subtle dotted graphic line, or short instruction ('Press thumb & pull down') right on the removable strip so users never rip open the glued top by mistake.
- Flood-print the visible interior mouth zone: Adding a dark emerald, burgundy, navy, or violet interior flood pass across the lower 3 inches of the inside back wall and ramp keeps the open mouth looking tailored rather than raw white.
Know your size? Compare pricing across up to 3 quantities.
Request a Quote →How does CubitPack verify your dispenser dieline before full production?
Review these prepress steps alongside our companion guides on gravity-feed dispenser slot height and ramp sizing and bottom gravity dispensers vs top pop-open cartons and counter trays, as well as our cosmetic comparison of straight tuck vs dispenser face mask boxes. Because every artwork file receives a manual structural and prepress inspection at CubitPack before plates are made, you never have to guess blade specs in Adobe Illustrator
- Color-coded vector CAD layers: Your free CubitPack dieline separates through-cuts, fold creases, 2:1 or 3:1 cut-tie perforations, glue-free zones, and 3 mm exterior bleed onto locked non-printing Illustrator PDF layers.
- Interactive 3D mockup before payment: Inspect both the sealed retail view and the opened dispensing mouth from every angle before approving production.
- Optional physical sample & $50 swatch kit: Test paperboard calipers and laminations with our $50 sample kit (credited to your first order), or order a custom physical prototype for high-volume co-packing lines.
- 1,000-box minimum with zero die charges: Approve your proof and receive flat-packed, side-glued dispenser cartons in 10–14 business days (4–5 business days rush) with free US shipping.
How do dual-chamber dividers and side gauge slots integrate into the dieline?
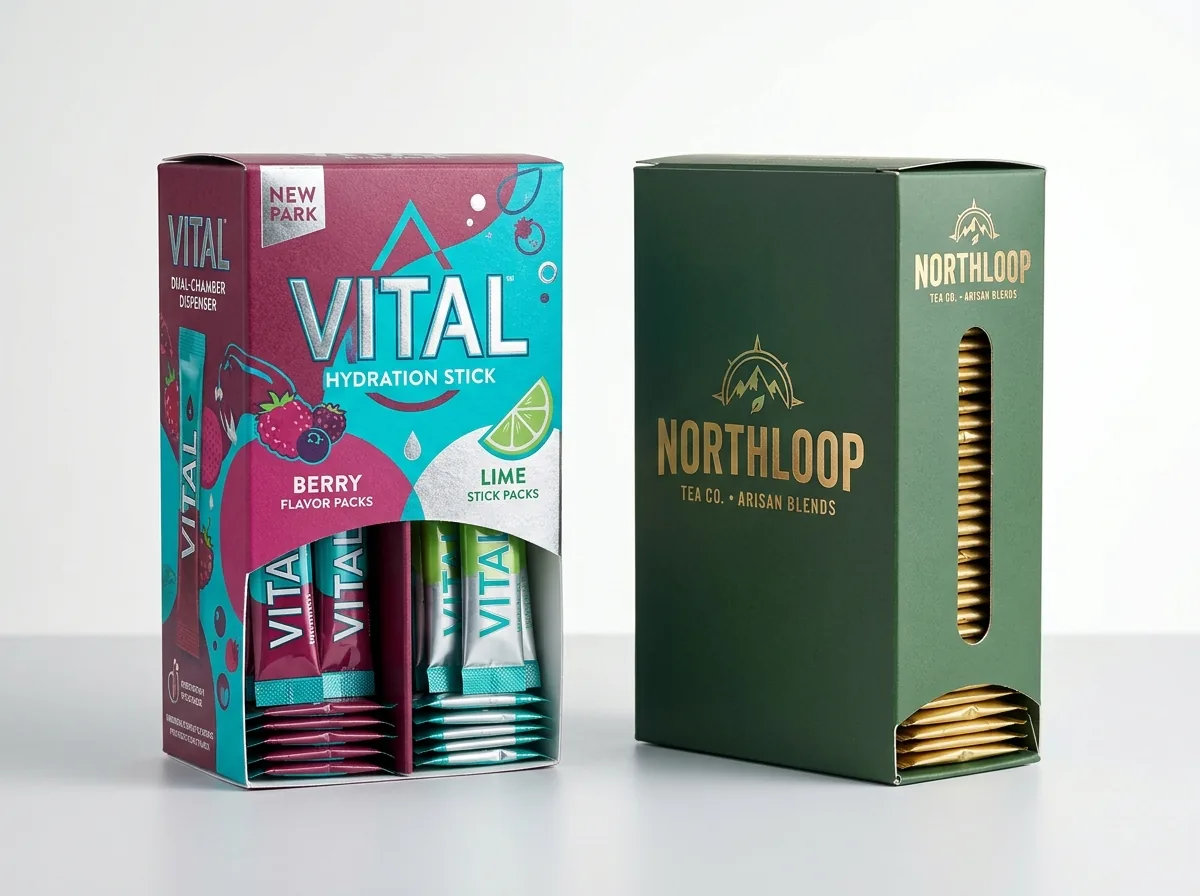
Once your base perforation rule is set, two low-cost CAD additions can elevate convenience for repeat subscribers and office breakrooms without adding plastic parts. First, a slotted vertical paperboard center partition divides a wider 6.5-inch carton into two independent gravity chutes with separate left and right tear hatches, ideal for pairing AM and PM wellness sticks or regular and decaf pods inside one cohesive countertop package. Second, a narrow 6 mm wide vertical die-cut gauge slot along the side wall (paired with printed count markers like '20 · 15 · 10 · Time to reorder') lets households see exact remaining sachet levels at a glance while keeping every foil packet stacked flat inside
- Keep side gauge slots 15 mm inbound from vertical fold creases so tower corner compression strength remains 100% intact.
- Leave gauge slots unpatched (plastic-free) whenever inner tea bags, sticks, or bars are already individually sealed in foil wrappers, keeping the entire folding carton curbside paper-recyclable without extra film window patching.
- Link a subtle reorder QR code right beside the bottom '5 left' tick mark on the side wall to drive effortless DTC replenishment right when households run low.
What dieline and prepress mistakes cause dispenser perforations to fail?
Check your Illustrator dieline proof against these five perforation and artwork pitfalls
- Using wide 1.5 mm ties under heavy BOPP soft-touch lamination without a thumb starter slit, forcing customers to tear ragged diagonal rips across the front panel.
- Placing the UPC barcode, lot/expiry box, or Supplement Facts panel across the removable tear-out strip where it gets thrown away on first use.
- Running hot-stamped metallic foil directly across a cut-tie perforation line so foil edges flake when the strip zips off.
- Drawing sharp 90-degree unrounded corners on a U-shaped tear hatch, causing tears to jump outward into the side walls.
- Flood-coating the glue lap or the sliding face of the 30-degree internal ramp with UV gloss or soft-touch film instead of masking glue and slide zones.
Packaging for this




Ready to order dispenser boxes? Compare up to 3 quantities with a free 3D mockup.
Request a Quote →Questions about dispenser boxes
Do I need to draw the cut-to-tie perforation dashes myself in Adobe Illustrator?
No. Simply place your artwork onto the free vector CAD template provided by CubitPack's structural specialists. Our die-makers program the exact millimeter cut-and-tie steel-rule blade profile automatically based on your chosen paperboard caliper and lamination.
Can soft-touch matte laminated dispenser boxes still tear cleanly?
Yes. By laminating only the exterior face, tightening the steel-rule perforation to a 2.5 mm cut / 0.8 mm tie ratio, and adding a clean semicircular thumb starter notch, soft-touch and matte laminated cartons zip open smoothly with zero film stretch.
What is the difference between a tear-away strip and a reclosable catch tray?
A 4-sided tear-away hatch detaches completely and is discarded, leaving an open slot above a bottom stop sill for flat sachets. A reclosable catch tray perforates only the top and sides while folding outward along a bottom crease with two side gusset ears to cradle round pods or candies.
Can I add metallic foil stamping and Spot UV to a perforated dispenser box?
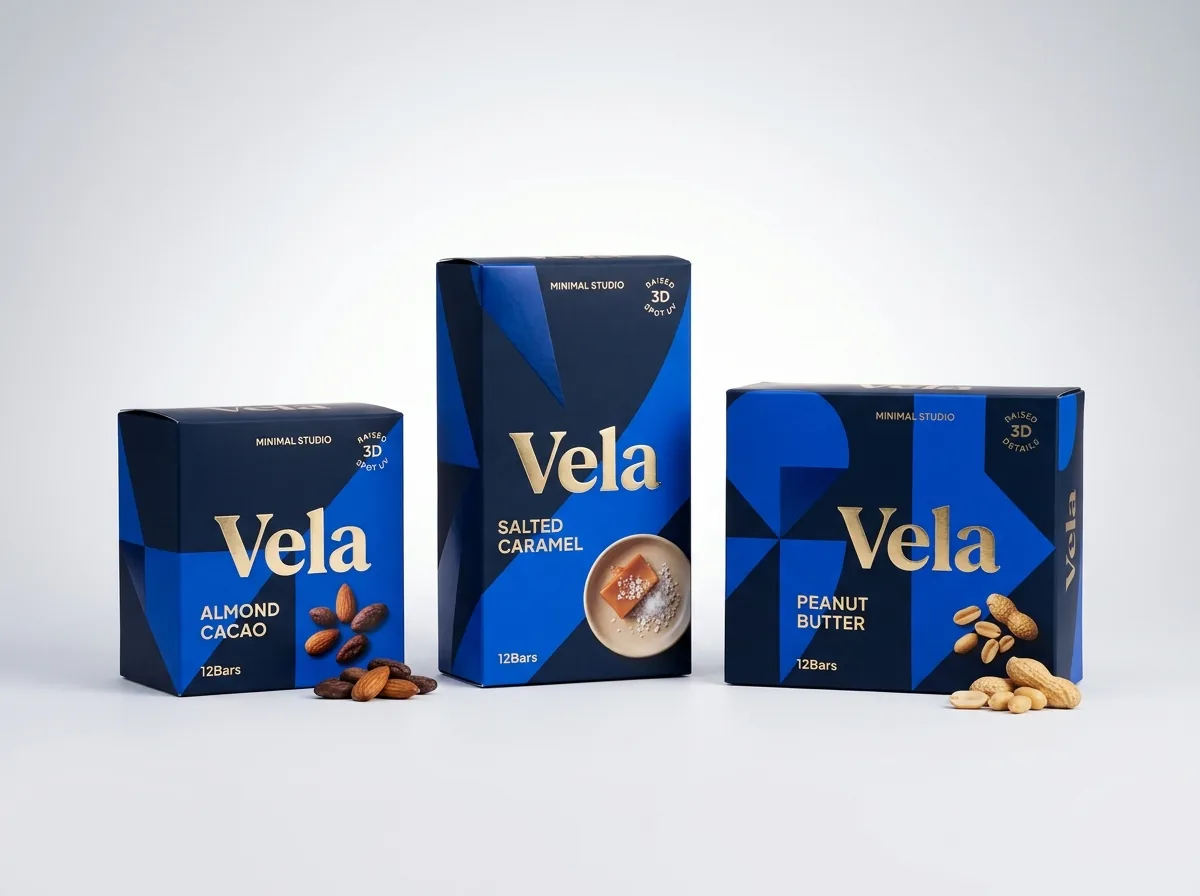
Yes. Foil stamping, embossing, debossing, and raised Spot UV all work beautifully on the permanent upper billboard wall, side panels, and bottom stop sill, as long as foil dies stay at least 5 mm away from the perforation line itself.
Are custom perforation shapes, side gauge windows, and dual-lane dividers included with zero die fees?
Yes. Every custom dispenser box order at CubitPack (from 1,000 units) includes custom steel-rule perforation blades, thumb notches, optional side stock-level windows, and internal ramps or dividers with zero die or plate setup charges.
Still have a question? Ask a packaging specialist.
Request a Quote →Request your dispenser boxes quote
Tell us your size and quantities, and one dedicated account manager prepares pricing for each tier.
- Free design & AI-to-print studio + 3D mockup
- No die or plate charges · 4–5 day rush available
- Free shipping to all 50 states
- 10% off your first order
We verified millimeter steel-rule cut-to-tie perforation ratios, BOPP laminated tear mechanics, hinged catch-tray gusset stops, and prepress foil/barcode clearance rules against ECMA Folding Carton Design Codes, Paperboard Packaging Council (PPC) tooling manuals, and TAPPI tear-resistance standards. Spot something wrong? Tell us and we fix it.
Sources
What changed
- November 6, 2026: First published with cut-tie perforation blade chart, tear-away vs reclosable scoop CAD comparison, and 4-zone prepress safe map.
More guides
New packaging guides by email
Sizes, materials and design tips. Unsubscribe anytime.