
How do I seal and design custom smell-proof mylar bags to keep odor in?
Short answer: To make custom smell-proof mylar bags as odor-tight as possible for shipping, fill through a funnel to keep the inner polyethylene strip clean and impulse heat-seal the top header above the tear notches. In artwork, keep logos 1.5 inches below the top edge and use selective white-ink knockouts for metallic foil-look highlights.
On this page
- Why must you heat-seal the top header above the zipper before shipping
- Where are the no-text zones on a custom smell-proof mylar bag dieline
- How do you create metallic foil highlights using white-ink knockouts
- Where should barcodes, batch stickers and state compliance symbols go
- What drives the cost of custom smell-proof mylar bags and how can I save
- Common mistakes
- FAQs
Request a custom quoteFree dieline & 3D mockup
Even the heaviest aluminum-foil or VMPET barrier laminate will leak aroma if the top header is not welded cleanly or if artwork crowds the functional seal zones. A resealable press-to-close zipper is designed for convenient home re-closing between uses, not as a primary hermetic shipping seal. After filling your pouch, running a tabletop impulse sealer or continuous band sealer across the upper header above the V-cut tear notches fuses the inner linear low-density polyethylene (LLDPE) layers into a clean, continuous weld that shows if the bag was opened. On the design side, building your artwork on a proper flexible pouch dieline keeps text clear of the ⅜ inch side welds, the 1.5 inch top zipper header and the bottom gusset fold, while letting you knock out selective areas of the white ink underbase so the metallic barrier core gleams through your graphics without a separate foil-stamping plate.
Why must you heat-seal the top header above the zipper before shipping?
A common mistake first-time packers make with printed smell-proof mylar pouches is pressing the plastic zipper shut by hand and dropping the bag straight into a mailer box. While a single-track or dual-track zipper traps everyday scent on a kitchen counter, air-cargo pressure drops and parcel vibration push aromatic gases right past the mechanical ends of an unsealed zipper track. Every open-top odor-barrier pouch includes a ⅜ to ½ inch strip of unsealed film at the very top lip, positioned directly above the V-cut tear notches and the zipper flange. Once your product is inside and the zipper is pressed closed, welding that upper header with a heat sealer locks the pouch in a continuous four-side sealed envelope until the customer tears the notch open.
- Step 1 (Fill with a wide funnel): reach past the open zipper track so spice dust, coffee chaff or herbal resin never touches the inner seal strip.
- Step 2 (Burp excess air & zip shut): press the excess air puff out gently so the bag isn't ballooned, then zip the track closed.
- Step 3 (Weld above the tear notches): place the top header flat between the jaws of a 5 mm to 8 mm impulse sealer or continuous band sealer.
- Step 4 (Let the weld cool flat): allow 2 seconds for the molten inner LLDPE layer to solidify before tossing the pouch into a master carton.
- Step 5 (Squeeze-test one sample per batch): press the sealed pouch firmly between both palms to verify zero air hiss along the top weld and side seams before packing out the case.
Where are the no-text zones on a custom smell-proof mylar bag dieline?
When our prepress team sends your free flat dieline and 3D mockup, you will see full-bleed background color extending to every outer edge, while logos, barcodes and compliance text stay inside an inner safe margin. Why? Because heated sealing jaws clamp down along the left, right and top edges of the pouch, stamping a ribbed or waffled texture into the film that distorts small typography. Use the dieline layout table below to position your front branding, back ingredient or terpene tables, and lot-code sticker zones across both stand-up gusseted bags and custom flat pouches.
| Pouch zone | Dimension on dieline | What happens here during converting & packing | Artwork & typography rule |
|---|---|---|---|
| Outer bleed margin | +0.125 in (⅛ in) outside cut | Slit and trimmed during roll-to-pouch converting | Extend background colors and patterns all the way to the bleed line |
| Left & right side welds | 0.3125 to 0.375 in per side | Vertical heat-seal bars fuse front and back webs together | Background ink only; keep all text and logos at least ½ in from outer sides |
| Top header & tear notches | Top 0.50 in to 0.75 in of height | Impulse heat-seal weld, V-notches and optional hang hole | Print a clean 'Tear Here' arrow; never place brand logos in the tear-off strip |
| Zipper track zone | 0.75 in to 1.625 in from top lip | Internal zipper flange is heat-welded to the inner LLDPE wall | Avoid fine text or faces; heat from zipper welding creates a horizontal ridge |
| Center billboard panel | Between zipper and lower gusset crease | Flattest, smoothest viewing area on the filled pouch | Place primary brand logo, flavor/strain badge, net weight and hero art here |
| Bottom gusset W-fold | Lower 1.25 in to 2.0 in of wall | Curved lower wall pulls inward as the bottom gusset expands | Keep barcodes and small mandatory text above the lower gusset fold line |
How do you create metallic foil highlights using white-ink knockouts?
One of the best design perks of ordering opaque custom mylar bags is that the bag already has a bright silver metallic layer (VMPET or aluminum foil) built right into its middle core. To print solid colors and crisp white text on that silver film, we lay down an opaque white ink underbase beneath your CMYK and Pantone colors. Wherever our designers intentionally leave a gap ('knockout') in that white ink underbase, your transparent CMYK or Pantone inks print directly onto the mirror-like metallic substrate. Print a warm yellow-orange ink over the bare metallic zone and it gleams like rich gold foil; print magenta or emerald green over the knockout and you get a shimmering anodized metallic badge with zero hot-stamping plate charges.
- Solid color areas: backed by 100% opaque white underbase so brand colors stay true and non-reflective.
- Raw silver foil accents: 0% white ink + 0% CMYK lets the mirror barrier core shine through as bright chrome silver.
- Tinted metallic gold, bronze or neon: 0% white ink + transparent CMYK/Pantone tint creates any custom metallic foil shade.
- Matte + Spot UV contrast: laminate the entire pouch in dead-flat matte or soft-touch film, then add glossy Spot UV over the metallic logo.
Know your size? Compare pricing across up to 3 quantities.
Request a Quote →Where should barcodes, batch stickers and state compliance symbols go?
Many brands using odor-barrier pouches sell across regulated botanicals, dietary supplements, specialty coffee or gourmet spice categories where every batch has a unique harvest date, roast date, terpene percentage or QR lab-test link. Instead of printing a separate pouch run for every batch, smart founders print a master branded pouch with a dedicated rectangular landing zone on the back panel for a thermal or roll label. If you apply batch stickers or state universal symbols using custom labels or custom roll labels, place the landing box on the flat upper-middle back panel, above the bottom gusset curve and below the zipper ridge. Always print UPC barcodes with dark black bars on an opaque white background box so retail scanners never struggle with metallic glare.
What drives the cost of custom smell-proof mylar bags and how can I save?
Four main factors drive your per-bag unit price: the outside Width × Height × Gusset surface area, the barrier core structure (metallized VMPET vs solid aluminum foil), the closure hardware (standard press-to-close zipper vs dual-track or two-step closure on custom child-resistant mylar bags), and your total order quantity. The easiest way to lower your cost per bag across a multi-flavor or multi-strain lineup is to standardize on one shared pouch dimension (for example, 4 × 6 × 2 inches across six spice rubs or eight botanical varieties). When all SKUs share the exact same Width × Height × Gusset and film stack, we gang-run your designs together with zero die or plate charges. Plus, new CubitPack customers get 10% off their first order, free design help, and free shipping to all 50 US states.
- Share one bag size across SKUs: combine 2, 4 or 10+ scents or flavors of the same dimensions into one volume tier.
- Use white-ink knockouts for foil effects: get metallic gold, silver and colored foil badges without separate foil-stamping plates.
- Print master bags + batch stickers for micro-lots: order your core pouch in bulk and apply variable batch labels per harvest.
- Approve a free 2D dieline proof & 3D mockup: verify every heat-seal margin, tear notch and metallic knockout before paying.
What are the most common sealing and artwork mistakes on smell-proof mylar bags?
Avoid these five packing-line and prepress mistakes before sending your odor-barrier pouches to production
- Shipping pouches with only the press-to-close zipper shut instead of impulse heat-sealing the top header above the tear notches.
- Dumping powdery spices, coffee grounds or herbs straight through the mouth without a funnel, coating the inner LLDPE seal strip with dust.
- Placing your brand logo in the top 1.5 inches of the pouch where the impulse heat seal, tear notches and zipper weld sit.
- Printing a UPC barcode directly over bare metallic film without a solid opaque white background box, causing scanner glare.
- Ordering slightly different bag dimensions for every flavor SKU instead of sharing one standard pouch size to combine print volume.
Packaging for this
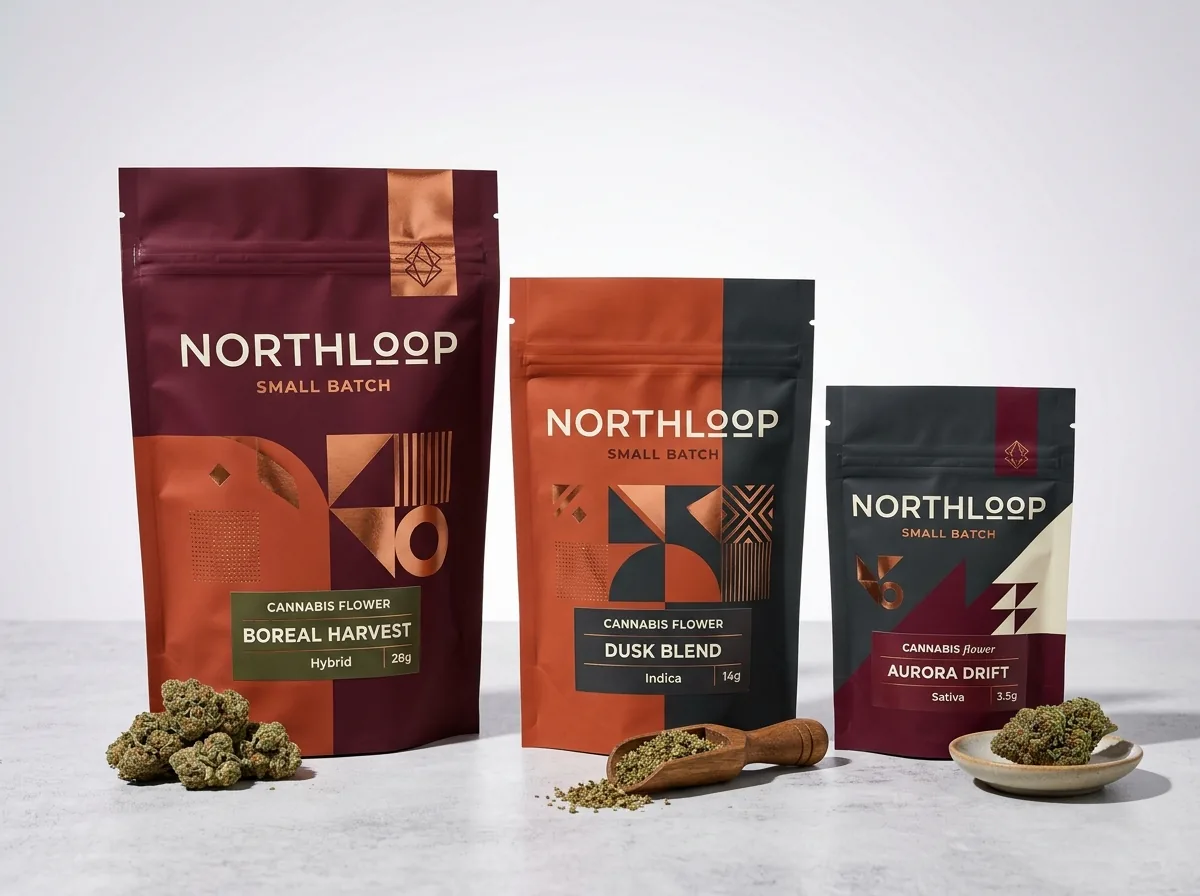
Ready to order smell proof mylar bags? Compare up to 3 quantities with a free 3D mockup.
Request a Quote →Questions about smell proof mylar bags
What kind of heat sealer do I need for custom smell-proof mylar bags?
A tabletop hand impulse sealer with a 5 mm or 8 mm wide heating element works well for runs up to a few thousand bags, while a continuous band sealer speeds up larger runs. Set the heat dwell time high enough to melt the inner LLDPE liner without scorching the outer PET film.
Why won't my smell-proof mylar bag heat-seal properly?
Almost every weak heat seal is caused by either fine powder/oil contamination on the inner polyethylene strip or insufficient dwell time on thick foil laminates. Use a filling funnel that reaches below the zipper track and increase your impulse sealer dial by one setting.
Do I pay extra for metallic foil accents on a smell-proof mylar bag?
Metallic effects can be made by knocking out the white ink over a metallized or foil core, so no foil-stamping plate is needed and there are no plate charges. Your quote shows the exact price.
Can I print multiple flavors, scents or strains in the same smell-proof bag order?
Yes. Select 2 designs or 3+ designs in our quote form and list how many bags you need per SKU. Keeping the exact same Width × Height × Gusset and barrier film across all varieties lets you combine your quantity for a lower unit cost.
How far from the top edge are the tear notches and zipper placed?
On standard smell-proof pouches, the impulse heat-seal zone occupies the top ⅜ to ½ inch, the V-cut tear notches sit at roughly ½ to ⅝ inch from the top lip, and the resealable zipper track sits between ¾ inch and 1.5 inches below the top edge.
Will your team check my dieline and white ink knockout before printing?
Yes. Every CubitPack order includes free design help, a flat 2D dieline proof showing exact seal zones and white-ink knockouts, and a 3D mockup that you approve before payment.
Still have a question? Ask a packaging specialist.
Request a Quote →Request your smell proof mylar bags quote
Tell us your size and quantities, and one dedicated account manager prepares pricing for each tier.
- Free design & AI-to-print studio + 3D mockup
- No die or plate charges · 4–5 day rush available
- Free shipping to all 50 states
- 10% off your first order
The heat-sealing workflow, dieline clearance zones and white-ink underbase knockout rules in this guide are based on our prepress checklist for multi-layer foil and VMPET barrier pouches. A CubitPack packaging specialist reviewed every step. Spot something wrong? Tell us and we will fix it.
Sources
What changed
- October 22, 2026: First published.
- October 22, 2026: Updated specifications, terminology, and verified source links.
More guides
New packaging guides by email
Sizes, materials and design tips. Unsubscribe anytime.