
How do you design printed cardboard inserts that fold fast on the packing line?
Short answer: Design custom cardboard inserts with four to six straight 90-degree parallel fold scores instead of complex origami tabs, align corrugated flutes perpendicular to primary load-bearing creases, add 0.5-inch half-moon thumb notches beside flush wells, and print onboarding steps right on the deck.
On this page
- Which structural dieline choices cut warehouse folding time in half
- Where should you place step numbers, QR codes and thumb notches on the insert deck
- How do you prevent ink cracking and flute crush on printed cardboard inserts
- How can a printed cardboard insert replace separate instruction cards and tissue
- How do you keep unit cost low on custom printed cardboard inserts
- Common mistakes
- FAQs
Request a custom quoteFree dieline & 3D mockup
A cardboard insert has to serve two people with opposite goals: your customer opening the box on camera, and your warehouse or 3PL packer assembling 500 trays an hour at a fulfillment bench. When an insert dieline relies on twelve tiny locking tabs and reverse tuck flaps, kitting labor slows to a crawl and packers inevitably skip folds that were meant to cushion fragile glass. By engineering a single-piece U-channel or four-leg riser platform that pops into shape in three to five seconds without tape or glue, you keep fulfillment fast while protecting every bottle. At the same time, treating the flat top deck of the insert as a printed billboard lets you add 1-2-3 product ritual numbers, QR codes and brand copy so you never have to print or pack a separate paper instruction leaflet.
Which structural dieline choices cut warehouse folding time in half?
Every additional crease line on a flat die-cut blank adds roughly one to two seconds of hand labor at the packing station. Over a 2,500-box production run, trimming four unnecessary locking tabs saves nearly three full hours of warehouse payroll. When our design team builds flat-folding cardboard inserts, we design the side and end legs so the outer walls of the mailer box hold the tray's 90-degree legs upright automatically once dropped inside. Instead of requiring packers to thread tiny friction locks on all four corners, the packer simply bends the left and right legs downward, drops the U-shaped platform into the mailer, and presses the products into the cutouts.
- Use wall-supported U-legs: let the inside walls of the mailer box hold the insert's folded legs at 90 degrees without corner tab locks.
- Pre-break heavy corrugated scores: deep, clean rule creasing lets E-flute and B-flute legs fold with light finger pressure.
- Use asymmetrical cavity layouts: if your kit has three distinct bottles, their unique cutout shapes make it impossible for packers to load the tray upside down.
- Switch to pre-assembled slotted grids for 6+ identical jars: two cross-slotted strips slide together faster than folding multi-wall trays.
Where should you place step numbers, QR codes and thumb notches on the insert deck?
Once your customer lifts the lid of your mailer box, the flat top face of the cardboard insert surrounds your products like a picture frame. Use the table below to plan your artwork safe zones, finger clearances and typography hierarchy across the insert deck. Keep all text, foil-stamped icons and QR codes at least 0.125 inches (1/8 in) away from raw cavity cut lines and fold scores so die-cutting tolerances never clip a letter. When designing a multi-step cosmetic, hair care or supplement kit, numbering each cutout 1, 2 and 3 along the top bridge tells the customer the exact order of use before they even pick up the first bottle.
| Insert deck feature | Recommended dimension / zone | Functional & unboxing purpose |
|---|---|---|
| Half-moon thumb notches | 0.5 to 0.625 in wide × 0.25 in deep | Lets fingers grip flush jars and cartons without tearing the deck |
| Artwork safe zone from cuts | 0.125 in (1/8 in) inside all cut & score lines | Prevents text or foil from shifting into a bottle cutout or crease |
| Bleed past outer cut & cavities | 0.125 in (1/8 in) ink extension into cutouts | Ensures zero white board slivers around die-cut bottle wells |
| Step numbers & product labels | 10 pt to 14 pt bold type beside or below well | Guides 1-2-3 skincare or supplement routines without a booklet |
| Onboarding QR code zone | 0.75 × 0.75 in minimum on flat center bridge | Scans cleanly on phone cameras when surrounded by a white quiet border |
| Hidden under-tray message | Printed on bottom floor or secondary shelf | Reveals a surprise thank-you note when the customer lifts the bottle |
How do you prevent ink cracking and flute crush on printed cardboard inserts?
When a cardboard insert is flood-printed in a rich dark color (such as espresso brown, forest green, burgundy or matte black) and folded 90 degrees or 180 degrees along its leg scores, the outer paper fibers stretch under tension. On un-laminated paperboard or when the score runs against the paper grain, those stretched surface fibers can split slightly and expose a thin white line of raw board along the fold. Our prepress and structural team prevents score cracking in three ways. First, we orient the paper grain and corrugated flutes properly relative to the primary load-bearing creases. Second, for heavy dark ink floods on folding paperboard or white E-flute, we recommend adding a thin flexible matte, gloss or soft-touch film lamination that holds the surface ink together across sharp bends. Third, if you prefer an un-laminated 100% raw paper feel, you can run a clean 0.0625-inch unprinted knockout line along hidden downward fold scores or print white ink on natural brown kraft board. On fluted corrugated inserts, we also control press impression so heavy areas of ink and metallic foil stamping never crush the underlying E-flute arches. Keeping the micro-flutes intact preserves the full 1/16-inch cushioning thickness across the top deck and side legs.
Know your size? Compare pricing across up to 3 quantities.
Request a Quote →How can a printed cardboard insert replace separate instruction cards and tissue?
Many e-commerce brands order three separate internal components for one box: an unprinted insert tray, a printed custom insert card or booklet, and a sheet of custom tissue paper. While that layered look is classic for luxury gifts, loose cards often slide over the products during parcel transit and cover up your bottles at the moment of unboxing. By printing your brand story, morning-and-night routine steps, ingredient callouts and reorder QR code directly onto the deck of your cardboard insert (and pairing it with a printed inside lid on custom mailer boxes), every word stays locked in place around the products. You eliminate an entire SKU from your inventory and save the kitting step of dropping a loose card into every box.
How do you keep unit cost low on custom printed cardboard inserts?
Four main factors drive the unit cost of a custom cardboard insert: the board stock (single-ply paperboard vs E-flute or B-flute corrugated), the total flat unfolded sheet area in square inches, the print and finish pass (unprinted vs 1 Pantone vs full CMYK and foil), and your order quantity. To get a custom branded look at the lowest possible unit cost, print a 1-Pantone solid flood or bold typography on natural brown kraft or white E-flute board, and keep leg depths only as tall as needed to suspend your product. Remember that CubitPack never charges cutting die or printing plate fees, gives you 10% off your first order, and beats any written US quote for the same specs. Minimums depend on the product; we confirm yours with your quote, with free dieline engineering, a free 3D mockup and free 50-state shipping in 10 to 14 business days.
- Extend background artwork 0.125 inches INTO every internal cavity cutout so no white board rim shows around your bottles.
- Keep flat unfolded dimensions compact by using U-legs rather than full four-sided double rollover walls when outer box walls already provide side support.
- Compare three quantity tiers (such as 500, 1,000 and 2,500) in Step 1 of the quote form to see volume price breaks.
What are the most common printed cardboard insert design mistakes?
Check these five prepress and ergonomic details on your digital proof before going to press
- Stopping background color right at the cavity cut line instead of bleeding ink 0.125 inches into the cutout hole, which leaves a white halo if the die shifts slightly.
- Placing small 7 pt ingredient text or a QR code right across a 90-degree crease score where the board bends downward.
- Designing a 12-tab origami insert that takes warehouse staff 45 seconds per box to fold when a 4-score U-riser holds the same bottle in 5 seconds.
- Flooding heavy un-laminated black ink across sharp 180-degree rollover folds without protective lamination or score relief.
- Forgetting half-moon thumb notches on snug rectangular wells, forcing customers to pry cosmetic cartons out with their fingernails.
Packaging for this

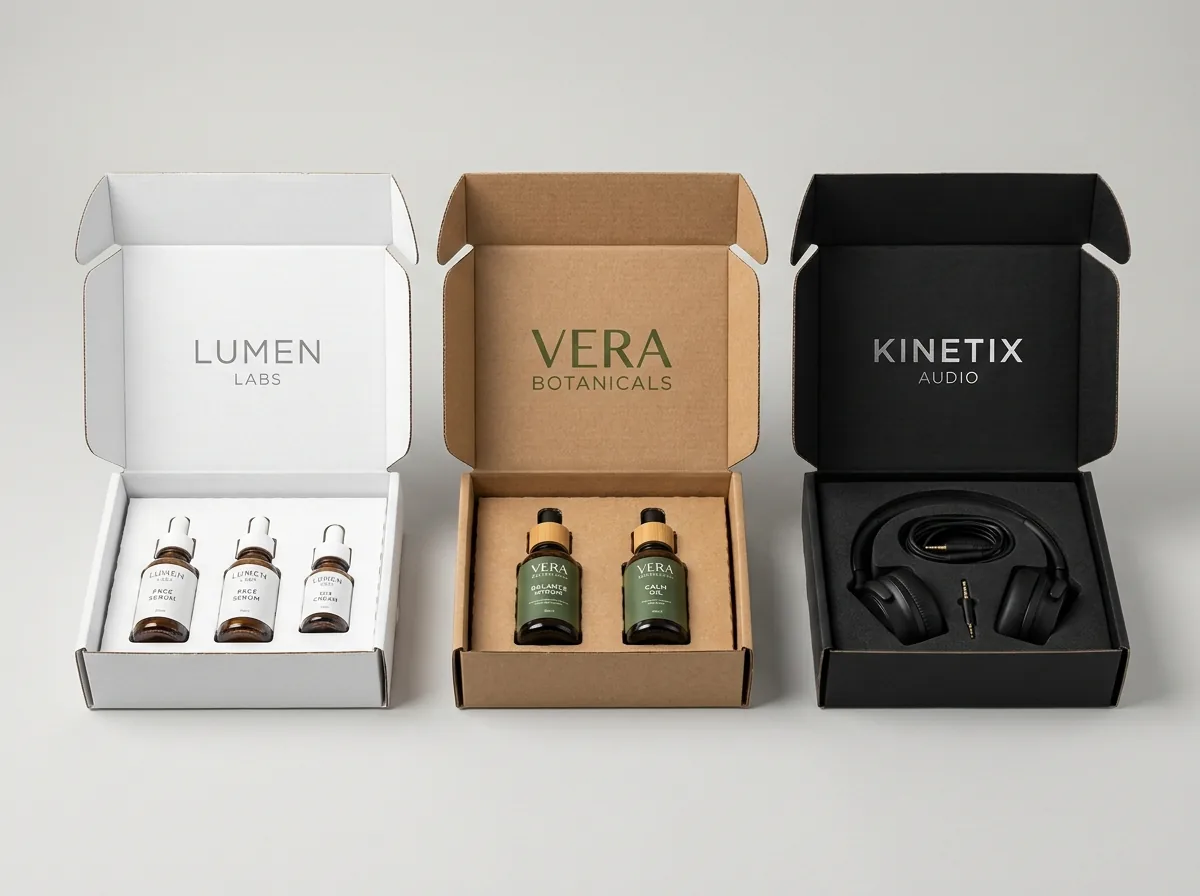
Ready to order cardboard inserts? Compare up to 3 quantities with a free 3D mockup.
Request a Quote →Questions about cardboard inserts
Do I need to add bleed inside the product cutouts on a printed cardboard insert?
Yes. Just as you add 0.125 inches (1/8 in) of bleed outside the outer perimeter cut line, extend your background color or pattern 0.125 inches inward past every internal cavity cut line so the die punches cleanly through solid ink.
How long should it take a warehouse packer to fold a custom cardboard insert?
A well-engineered U-channel riser or 4-leg corrugated cradle should fold along its pre-creased score lines and drop into the mailer box in 4 to 8 seconds without tape or glue. Tell us if fast 3PL kitting is a priority.
Can CubitPack pre-fold and kit our cardboard inserts inside our custom boxes?
Yes. While most brands prefer flat-packed delivery to save up to 80% of warehouse storage space, we also offer full kitting and assembly services if you want your inserts pre-folded and placed inside your boxes before shipping.
What size thumb notches work best on a cardboard insert?
A half-moon semicircular notch measuring 0.5 to 0.625 inches wide and 0.25 inches deep on two opposite sides of a cavity gives comfortable finger clearance to lift out flush jars, compacts or tuck cartons.
How do I prevent dark ink from cracking on cardboard insert fold lines?
Pair dark CMYK or Pantone flood coats with matte, gloss or soft-touch lamination, which binds the surface fibers across 90-degree bends. Our design team also align paper grain and creasing rules to minimize fiber stress.
Is there an extra charge for custom cavity shapes or thumb cutouts?
No. CubitPack never charges cutting die or printing plate fees. Whether your insert has one round candle cutout or eight contoured cosmetic wells with thumb notches, dieline engineering and tooling are included free.
Still have a question? Ask a packaging specialist.
Request a Quote →Request your cardboard inserts quote
Tell us your size and quantities, and one dedicated account manager prepares pricing for each tier.
- Free design & AI-to-print studio + 3D mockup
- No die or plate charges · 4–5 day rush available
- Free shipping to all 50 states
- 10% off your first order
The prepress bleed rules (0.125 in outer and inner cavity bleed), thumb-notch dimensions and folding-ergonomics recommendations in this guide come from TAPPI scoring standards and CubitPack prepress workflows. A packaging specialist checked every section. Spot an error? Tell us and we will fix it.
Sources
What changed
- October 22, 2026: First published.
- October 22, 2026: Updated specifications, terminology, and verified source links.
More guides
New packaging guides by email
Sizes, materials and design tips. Unsubscribe anytime.