
How do I design paperboard cable winders and connector spec panels for custom cable boxes?
Short answer: Use a one-piece die-cut paperboard winder card with fold-over waist wings to hold the coiled cord and two top keyhole slots to park both connector tips side by side. On the outer custom cable boxes, place a 1:1 connector diagram, length in feet/meters, and wattage or speed badges on the front.

On this page
- How does a 100% paperboard cable winder replace plastic blisters and twist ties
- What technical specs belong on the front, side and back panels of a cable box
- How do 1:1 connector diagrams prevent wrong-plug customer returns
- How do you showcase braided nylon, silicone and gold-plated plugs with print finishes
- How can I consolidate multiple cable lengths and colorways into one print run
- Common mistakes
- FAQs
Request a custom quoteFree dieline & 3D mockup
Two details separate flagship cable packaging from generic bargain-bin boxes: how the cord is wound inside the carton, and how fast a buyer can read the connector types, length and speed rating on the outside. Traditional cable packaging relied on PVC clamshells and plastic-coated wire twist ties that scratched anodized aluminum connector shells and frustrated customers during unboxing. Modern cable brands replace all internal plastic with a flat die-cut paperboard spool card (or a printed paper belly band) that wraps the circular coil and locks both connector heads in separated top slots behind a front window. On the exterior artwork, a clear four-part hierarchy (Connector A to Connector B, 1:1 plug silhouettes, length in ft/m, and 240W / 40Gbps / 8K60Hz badges) prevents wrong-cable returns. CubitPack engineers both your printed cable boxes and paperboard winder dielines for free.
How does a 100% paperboard cable winder replace plastic blisters and twist ties?
When two anodized aluminum or gold-plated connector shells dangle loose inside a coiled cable loop, parcel vibration causes the metal barrels to knock against each other and leave visible scuffs before the customer opens the box. At the same time, major retailers and tech buyers increasingly mandate 100% plastic-free, curbside-recyclable internal packaging. A die-cut paperboard spool card (also called a connector-parking card) solves both problems from a single flat sheet of 16 pt to 18 pt card stock. The lower half of the card features two side wings with friction-lock tabs that fold around the waist of the circular cable coil, replacing plastic wire ties. The upper half of the card features two separated keyhole slots spaced 0.75 to 1.00 inch apart that grip the strain-relief necks of both connectors, holding the two plug tips parallel and immobile. Because the winder card ships flat alongside your flat-packed folding cartons, it takes almost zero extra freight volume and folds around the cable in seconds during kitting.
- Separated keyhole plug slots: grip each connector neck individually so anodized USB-C, Lightning or HDMI shells never touch.
- Fold-over coil waist wings: wrap around the circular wire bundle and lock into a back slot without glue, tape or plastic twist ties.
- Window background contrast: use crisp white card behind dark braided cords, or matte black/kraft card behind white and silver cables.
- Paper belly-band option: for closed windowless cartons, a 1.0-inch wide printed paper strip wraps the coil and tears off cleanly with a thumb tab.
- Included velcro strap slot: if your cable ships with a reusable hook-and-loop strap, we die-cut a center notch so the strap secures the coil to the card.
What technical specs belong on the front, side and back panels of a cable box?
Because two USB-C cables can look identical on the outside while supporting completely different power and data standards (such as a basic 60W USB 2.0 charging cord vs a 240W USB4 40Gbps video-and-data cable), shoppers rely entirely on your box typography to pick the right SKU. A clear visual hierarchy also helps retail store associates restock hooks accurately and reduces pre-purchase support tickets. Follow the four-zone panel layout in the table below so retail shoppers, A/V installers and warehouse pickers can read every critical specification without turning the box over three times. Keeping the top header and bottom spec bar in identical positions across every box in your product line builds a clean, recognizable brand block on retail walls.
| Carton panel zone | Essential information to display | Recommended visual treatment |
|---|---|---|
| Top front header | Brand wordmark + Connector A to Connector B (e.g., USB-C to HDMI 2.1) | High-contrast bold sans-serif + 1:1 end-view plug icons |
| Center front hero zone | Connector peephole window or 1:1 product render + braided weave callout | Die-cut window over spool card or raised gloss Spot UV render |
| Bottom front spec bar | Length in ft & m (6 ft / 2 m) + max watts (240W) + speed (40Gbps / 8K60Hz) | Color-coded length band + metallic foil or pill badges |
| Left & right side spines | Cable jacket material, bend-lifespan rating (25,000+ bends) & compatibility | Vertical model/length text for shelf-edge scanning |
| Back panel | Feature comparison grid (charging, data, video), pinout/E-Marker notes & UPC | Matte glare-free background + unvarnished 1.5 × 1.0 in barcode box |
How do 1:1 connector diagrams prevent wrong-plug customer returns?
Across e-commerce and electronics retail, the number-one reason customers return a working cable is ordering the wrong connector combination: buying USB-C to USB-C when their car or wall charger has a rectangular USB-A port, buying DisplayPort instead of HDMI, or buying a charge-only USB-C cord expecting it to drive an external 4K monitor. Eliminate those returns on the front panel of your custom cable boxes by printing an actual-size (1:1 scale) front-and-profile illustration of both connector tips connected by a dotted line, labeled clearly in plain words (for example, 'USB-A (Rectangular) to USB-C (Oval)'). Right below the connector diagram, include three simple yes/no capability icons (Fast Charge: 240W · Data Transfer: 480Mbps or 40Gbps · Video Output: Yes / No) so buyers know immediately what the cord does and does not support.
Know your size? Compare pricing across up to 3 quantities.
Request a Quote →How do you showcase braided nylon, silicone and gold-plated plugs with print finishes?
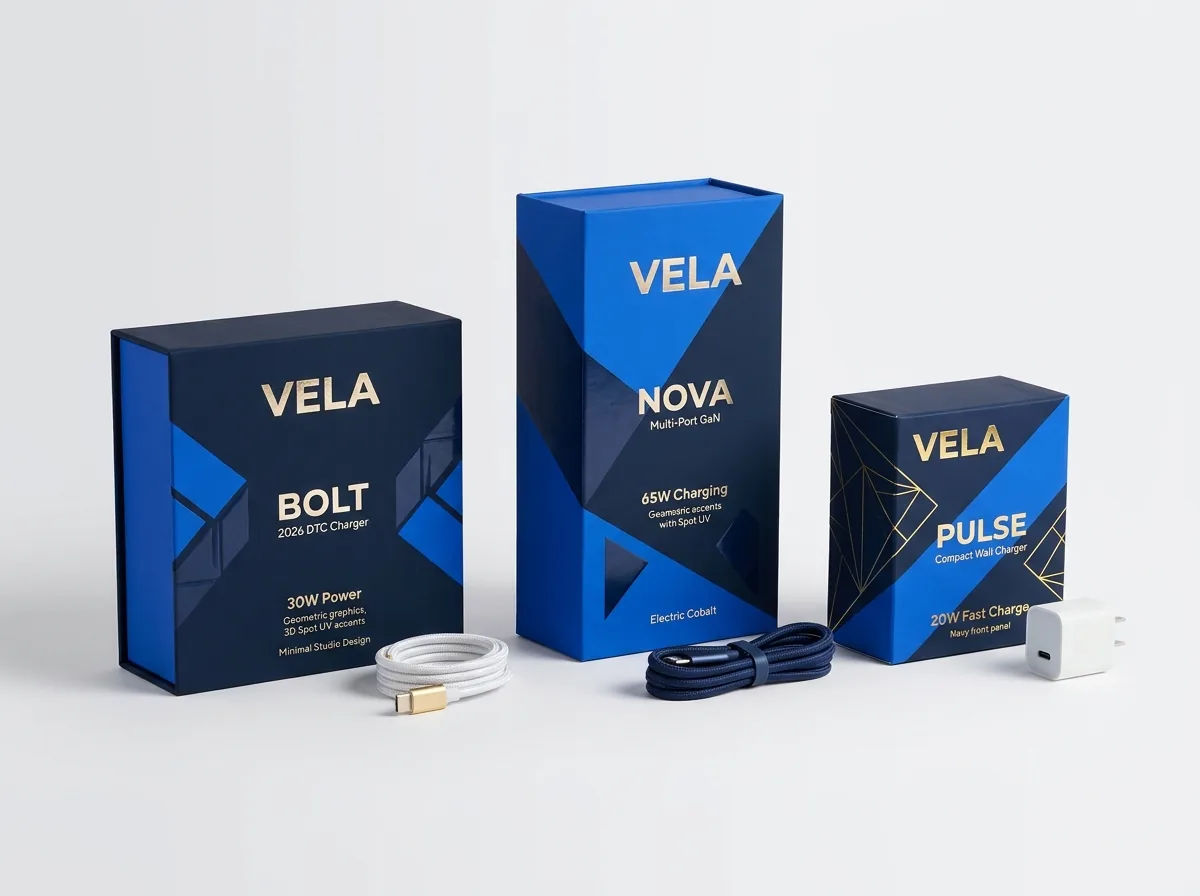
If you choose a closed straight-tuck or drawer-sleeve carton without a front window, your print finishes can recreate the tactile feel of the cable right on the outer paperboard. Start with a smooth matte or velvety soft-touch lamination over the whole carton so retail overhead lights do not create glare. Next, create a registered gloss Spot UV mask that traces the exact crisscross diamond pattern of your braided nylon jacket (or the smooth satin sheen of liquid silicone) and the anodized connector housings. When a shopper tilts the box in their hand, the raised gloss weave catches the light and can be felt with a fingertip. Adding a touch of gold, silver or copper foil stamping on the connector pins and the '240W PD 3.1' or '8K 60Hz' badge completes a flagship presentation. Pairing matte lamination with tactile Spot UV also protects dark charcoal or navy ink coverage from finger smudges and shelf rub on busy electronics pegboards.
How can I consolidate multiple cable lengths and colorways into one print run?
A typical cable line includes three lengths (3 ft, 6 ft, 10 ft), two connector pairs (C-to-C and A-to-C) and three colors (Obsidian Black, Glacier White and Cobalt Blue). Instead of engineering 18 different box sizes, standardize one master 3.25 × 1.125 × 4.75 inch carton and one shared custom cardboard insert winder card. With one shared dieline, you can either split your 1,000-unit, 2,500-unit or 5,000-unit folding carton run across multiple printed SKU artworks with zero die charges, or print one universal front-window carton (so the actual cable color and connector heads show through the window) and apply a wrap-around length/UPC custom QR code sticker in an unvarnished zone on the back panel. Before sending your files to print, ask our prepress engineers to overlay your front window cutout, inner paperboard winder dieline and outer carton score lines in one composite digital proof. Checking that composite proof alongside your interactive 3D mockup ensures the two connector keyhole slots center cleanly inside the window opening and that no regulatory icons, certification badges or UPC barcodes sit too close to a fold score or glue flap.
What are the most common cable winder and spec-panel design mistakes?
Clear connector callouts and snug paperboard winders protect both your hardware and your review rating. Avoid these five prepress and structural mistakes
- Parking both metal connector heads in a single shared cutout where the aluminum barrels rub and scratch each other during parcel transit.
- Showing only one connector plug on the front of an adapter cable box (such as USB-C to HDMI), leaving buyers guessing what the other end is.
- Printing '100W Charging Cable' on the front without clarifying on the back whether the cord supports video output (DisplayPort Alt Mode) or only USB 2.0 data.
- Forgetting to print the cable length in both feet and meters on the top tuck flap, slowing down warehouse pickers pulling from vertical bins.
- Using wire-core plastic twist ties inside an otherwise paperboard box instead of fold-over paperboard winder wings or a paper belly band.
Find your size
Suggested inside size: 2.75 × 0.875 × 4.00 in
A starting point. Your account manager confirms the size with you before the proof.
Quote this size →Packaging for this


Ready to order cable boxes? Compare up to 3 quantities with a free 3D mockup.
Request a Quote →Questions about cable boxes
Do you charge extra to design the internal paperboard cable winder card?
No. CubitPack includes free structural dieline engineering for both the outer cable carton and the internal die-cut paperboard winder card or belly band, with zero die or plate charges.
How do you size the keyhole slots on the paperboard winder so plugs do not fall out?
We measure the wider metal connector shell (such as a 0.48-inch wide USB-C housing) and the narrower flexible strain-relief neck (typically 0.22 inch). The connector pushes through the round upper hole and locks downward into the narrow neck slot.
Can I print onboarding info or a cable-care guide directly on the paperboard winder card?
Yes. Printing a warranty registration QR code, pinout specs or coil-care tips on the inner winder card (or inside the outer carton lid) eliminates the cost and waste of a separate paper leaflet.
What is the best way to package a cable that already includes a reusable velcro strap?
If your cable supplier wraps each coil with a branded hook-and-loop velcro tie, we die-cut two small horizontal slots in the center of the backing card. The velcro strap threads through the card slots, anchoring the coil and parking the two plugs at the top.
How do I set up a registered Spot UV mask for a braided cable render?
Simply send us your high-resolution product photo or vector artwork; our prepress team builds the vector Spot UV plate for free so the raised gloss coating aligns over the braided weave pattern and connector shells.
Will I see a 3D mockup of the outer cable box and inner winder before paying?
Yes. Every order includes a free digital proof and an interactive 3D mockup before payment so you can verify connector window alignment, spec badge legibility and barcode placement.
Still have a question? Ask a packaging specialist.
Request a Quote →Request your cable boxes quote
Tell us your size and quantities, and one dedicated account manager prepares pricing for each tier.
- Free design & AI-to-print studio + 3D mockup
- No die or plate charges · 4–5 day rush available
- Free shipping to all 50 states
- 10% off your first order
The keyhole connector-slot geometry and four-zone front-panel specification hierarchy in this guide are based on USB-IF and HDMI consumer labeling conventions plus CubitPack dieline standards in our published product specifications. A packaging specialist checked every section. Spot an error? Tell us and we will fix it.
Sources
What changed
- October 22, 2026: First published.
- October 22, 2026: Updated specifications, terminology, and verified source links.
More guides
New packaging guides by email
Sizes, materials and design tips. Unsubscribe anytime.