
How do I design custom craft kit boxes with dividers and inside-lid instructions?
Short answer: Design custom craft kit boxes around three zones: a front cover showing the finished craft, skill level and completion time; an inside lid printed with a supply checklist, ruler and QR video tutorial code; and custom internal dividers (floss cards, bead trays or E-flute jar partitions) that stage supplies neatly.
On this page
- What belongs on the front and back panels of a DIY craft kit box
- Which internal divider or organizer card fits each type of craft kit
- How can inside-lid printing replace loose instruction sheets and link to video tutorials
- Where do CPSC small-parts warnings and ASTM D-4236 art material marks go
- Which board stocks and finishes work best for adult maker vs kids' craft kits
- Common mistakes
- FAQs
Request a custom quoteFree dieline & 3D mockup
A great craft kit box does half the teaching before the maker even picks up a needle, hook or brush. On the outside, shoppers and gift buyers need to see a crisp photograph of the finished project alongside a 3-second badge bar showing the skill level (Beginner, Intermediate, Advanced), estimated project time, age grade and a 'What's Inside' supply list. When the maker opens the lid, internal structural organizers take over: slotted E-flute partitions keep heavy candle vessels or moist clay blocks from crushing glass fragrance droppers and paper patterns, while die-cut paperboard floss cards keep embroidery threads untangled. Printing your welcome note, a 6-inch ruler and a scannable QR video link directly inside the top lid turns the open box into a hands-free desktop instruction stand. At CubitPack, our structural and prepress team builds both the box and insert dielines for free.
What belongs on the front and back panels of a DIY craft kit box?
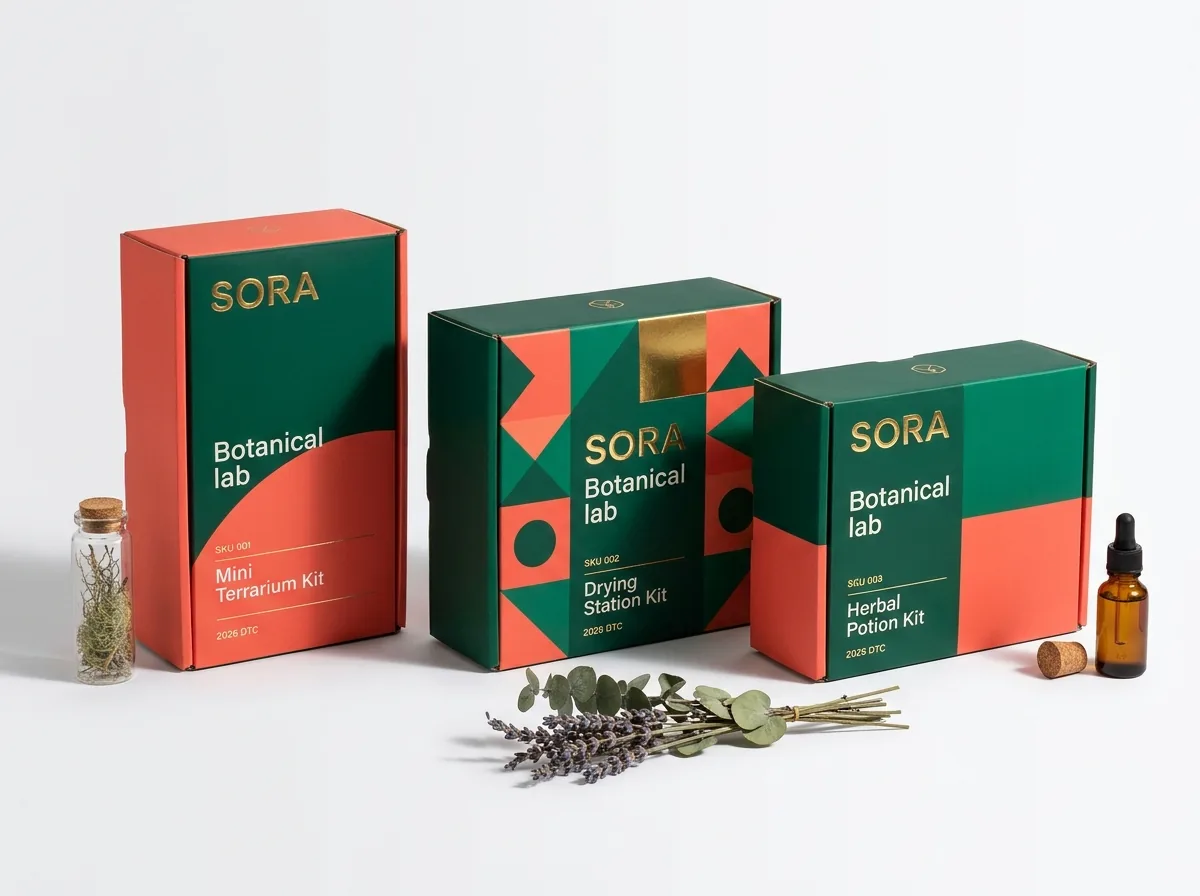
Unlike a standard retail product where the item inside is already finished, a craft kit asks the buyer to picture what they will make with their own hands. If your front lid only shows abstract botanical patterns or loose balls of yarn, gift shoppers will hesitate because they cannot tell whether the box contains finished decor or raw supplies, or whether a beginner can actually complete it. Anchor the front cover of your printed craft kit boxes with a well-lit hero photo of the completed embroidery hoop, crochet character, poured candle or beaded bracelet. Directly below or beside the photo, place a clean horizontal badge bar with three icons: skill level, estimated completion time (such as '2-3 Hours'), and minimum age. Reserve the back panel for a visual 'In This Kit' flat-lay diagram showing every tool included, plus a clear line noting any household item the maker must supply, like scissors or a warm water cup.
- Hero finished-project photo: show the exact item the maker will create at actual proportion.
- 3-icon badge bar: Skill Level (Beginner / Intermediate), Completion Time, and Age Grade (e.g., Ages 8+ or 14+).
- Visual 'What's Inside' checklist: numbered icons or flat-lay illustration of every supply included in the box.
- 'You Will Also Need' note: call out scissors, water cup, iron or tape so the maker is never surprised mid-project.
Which internal divider or organizer card fits each type of craft kit?
Mixed-media craft kits pack heavy, sharp, liquid and soft components into the same footprint. Without internal zoning, an 8-ounce candle jar or 1-pound air-dry clay block acts like a wrecking ball against a 1-ounce glass fragrance bottle, bamboo hoop or folded pattern sheet during parcel delivery. Even on lightweight needlework kits, loose skeins of embroidery floss tangle into knots if they are tossed in a bag. Use the table below to pair your supply mix with the right paperboard or corrugated insert. When you order your outer boxes, our design team builds the matching custom cardboard inserts and die-cut organizer cards on the same order with zero die or plate charges.
| Internal organizer type | Best craft kit supplies | How it protects & stages the project |
|---|---|---|
| Die-cut paperboard floss / yarn card | Embroidery, cross-stitch, punch-needle, friendship bracelets | Numbered punch holes keep thread colors sorted and visible in windows |
| Slotted E-flute corrugated grid | DIY candle-making, soap, pottery clay, resin & mosaic kits | Isolates heavy jars and clay blocks in crush-resistant cells |
| Multi-well paperboard bead tray | Kids' bead jewelry, charms, sequins & perler activity kits | Divided wells keep bead colors separated while crafting |
| Die-cut bottle & tube neck collar | Acrylic paint pots, ceramic glazes, essential oil droppers, glue | Locks small bottles upright so caps cannot leak or rattle |
| Stepped tool & hoop backing board | Bamboo hoops, crochet hooks, carving tools, knitting needles | Die-cut tabs hold sharp or long tools flat against the base |
How can inside-lid printing replace loose instruction sheets and link to video tutorials?
Loose single-sheet instruction flyers are the first thing a maker loses between crafting sessions, especially on multi-day crochet, knitting or embroidery projects. By printing the interior of an E-flute custom mailer box or two-piece lid, you turn the open box lid into a permanent instruction easel that stays propped upright on the desk. Print your welcome message, a numbered supply key, basic stitch diagrams and a high-contrast QR code linking to your step-by-step video lessons on the inside lid panel. Keep the QR code at least 0.8 × 0.8 inches with a quiet white border and matte varnish so smartphone cameras scan it instantly without glare. You can still pair the inside lid with fold-out custom insert cards when a project requires a full-scale iron-on transfer sheet or multi-page pattern chart.
Know your size? Compare pricing across up to 3 quantities.
Request a Quote →Where do CPSC small-parts warnings and ASTM D-4236 art material marks go?
If your craft kit is marketed to children or includes chemical art materials like glues, paints, ceramic glazes, dyes or two-part resins, federal labeling rules dictate exact panel placement. Under CPSC regulations (16 CFR 1500.19), children's kits intended for ages 3 to 6 (or kits with small beads, safety eyes or marbles) require the standard cautionary triangle and 'WARNING: CHOKING HAZARD - Small parts' block on the principal display panel (the front cover), set in the required type size and sharply contrasted against the background. Children's sewing or needlepoint kits that contain functional sharp points (16 CFR 1500.48) require a functional sharp-point notice for ages 4 to 8. In addition, the Labeling of Hazardous Art Materials Act (LHAMA, 16 CFR 1500.14) requires any craft kit containing glues, paints, inks, glazes, polymer clay or resin (whether for kids or adults) to carry a 'Conforms to ASTM D-4236' toxicology statement on the outer box so buyers can read it before purchase. Our prepress team checks your dieline to make sure these blocks sit clear of fold scores, windows and tape zones.
- Front cover (Principal Display Panel): age grading badge plus 16 CFR 1500.19 small-parts choking hazard triangle when required.
- Functional sharp points: clear cautionary notice on kids' sewing, felting or embroidery kits containing real needles.
- ASTM D-4236 block: reserve a clean, legible back-panel zone for LHAMA conformity statements on paints, glues, clays and resins.
- Barcode & SKU box: place a 1.5 × 1.0 inch black-on-white UPC barcode on the back or bottom panel for retail scanning.
Which board stocks and finishes work best for adult maker vs kids' craft kits?
Your board and coating choice sets the mood of the craft before the box is opened. Unbleached brown kraft board printed with opaque white ink and botanical colors gives embroidery, macramé, candle-making and Montessori kits an authentic studio workshop feel. Smooth bleached white card or white-lined E-flute corrugated board delivers the bright, color-accurate photography needed for multi-color crochet characters, paint-by-number canvases and kids' bead kits. For surface protection, choose matte lamination or soft-touch coating on adult needlework and gift kits so studio photos look velvety and glare-free. On children's slime, clay, resin and painting boxes, specify gloss lamination on the exterior so sticky fingers, water splashes and clay dust wipe right off the lid.
What are the most common custom craft kit box design mistakes?
Even beautiful illustration work can miss the mark if the box hides what the project makes or lets heavy supplies crush delicate parts. Check these five prepress traps
- Showing only decorative patterns or raw yarn on the front cover without a clear photograph of the finished craft project and skill badge.
- Packing heavy candle jars, clay blocks or paint bottles in the same unpartitioned space as glass fragrance droppers, bamboo hoops or paper patterns.
- Printing a tiny, low-contrast QR tutorial code over a dark textured background or across an inside lid fold score where phone cameras cannot scan it.
- Leaving thread punch holes too close to the outer edge of a paperboard embroidery floss card (< 0.25 in), causing the card to tear when wound.
- Hiding required CPSC small-parts choking hazard triangles on the bottom or inside flap instead of the front principal display panel.
Find your size
Suggested inside size: 7.5 × 7.5 × 1.25 in
A starting point. Your account manager confirms the size with you before the proof.
Quote this size →Packaging for this

Ready to order craft kit boxes? Compare up to 3 quantities with a free 3D mockup.
Request a Quote →Questions about craft kit boxes
Will CubitPack create the dielines for both the outer craft box and the internal dividers for free?
Yes. Send us the list and measurements of your craft supplies (such as jar diameters, hoop sizes, yarn skeins or thread counts), and our design team will create custom vector dielines for the outer box, slotted E-flute dividers and die-cut floss cards at no charge.
How small can the punch holes be on a custom paperboard embroidery floss organizer card?
Standard embroidery floss organizer cards use 0.25-inch (6 mm) or 0.3125-inch (8 mm) round or teardrop punch holes spaced at least 0.25 inch apart and set 0.25 inch inside the outer card edge so heavy paperboard never tears when makers pull thread strands.
Does printing instructions inside the lid of a craft kit box cost extra?
Adding two-sided (inside and outside) printing adds a second press pass compared with outside-only printing, but it often saves money overall by eliminating a separate printed instruction leaflet or insert card. Ask us to quote both options side by side.
How do I print bright pastel colors or a white QR code block on a brown kraft craft box?
Unbleached brown kraft fibers absorb transparent CMYK inks and shift light colors warmer. To keep pastel yarn illustrations crisp and make QR codes scannable, we print an opaque white ink underbase beneath your artwork and behind the QR code square.
Do adult paint, resin or ceramic glaze kits need the ASTM D-4236 label on the box?
Yes. Under federal LHAMA regulations (16 CFR 1500.14), the requirement that art materials conform to ASTM D-4236 applies to both children's and adult art and craft supplies whenever paints, glues, inks, glazes, clays or resins are packaged in the kit.
Can I gang-run multiple craft kit designs in one order to hit the 250 or 1,000 minimum?
Yes. As long as your embroidery, crochet or candle kits share the exact same box dimensions and dieline, select 2 designs or 3+ designs in the quote form to combine multiple project artworks into one production run.
Still have a question? Ask a packaging specialist.
Request a Quote →Request your craft kit boxes quote
Tell us your size and quantities, and one dedicated account manager prepares pricing for each tier.
- Free design & AI-to-print studio + 3D mockup
- No die or plate charges · 4–5 day rush available
- Free shipping to all 50 states
- 10% off your first order
Every CubitPack fact in this guide (1,000 folding carton minimum, 250 mailer minimum, 50 rigid minimum, 10 to 14 business day turnaround, free design help and zero die fees) comes from our published product specifications. CPSC small-parts/sharp-point rules (16 CFR 1500.19/1500.48) and LHAMA ASTM D-4236 placement guidelines were verified against CPSC guidance by a packaging specialist. Spot an error? Tell us and we will fix it.
Sources
What changed
- October 22, 2026: First published.
- October 22, 2026: Updated specifications, terminology, and verified source links.
More guides
New packaging guides by email
Sizes, materials and design tips. Unsubscribe anytime.